With more than 6 million registered users, Bluesky is fast becoming a decentralized force to be reckoned with — and with good reason.
Among the new wave of fediverse platforms and decentralized networks, Bluesky is possibly the easiest to get to grips with, thanks to its clean interface and ever-increasing community of all sorts of creators. From science to K-pop, there’s a space for everyone on the network.
Which is why (🥁🥁🥁…) we’re thrilled to share that Buffer now supports Bluesky! It’s one of our most requested integrations ever — more than 2,500 people upvoted the request on our suggestions board.
The Buffer integration supports posting, scheduling, and even threaded posts (something you’re not yet able to do natively) — we’ll get into all that below.
If you’re new to Bluesky and the world of decentralized social media, here’s a quick summary: Bluesky was created by former Twitter CEO Jack Dorsey, and is a decentralized social network built on an open-source protocol called AT protocol.
With the protocol, Bluesky’s mission is to create “an open foundation for the social internet so that we can all shape its future” because “social media is too important to be controlled by a few corporations.”
Here’s a great graphic by artist Davis Bickford that explains the company’s vision:
To mark the occasion, we teamed up with @davis.social to create a comic illustrating what Bluesky is all about.
Initially an invite-only network, Bluesky opened its proverbial doors in February 2024, welcoming more than 1 million new users in just one day.
🦋
If you’re a Bluesky newbie or on the fence about signing up, I recommend checking out our Bluesky beginner’s guide for everything you need to know about the platform.
That said, adding another network to your social stack is a big decision. With Buffer, we hope to make that a little easier for you with handy planning, publishing, and cross-posting features.
Another helpful feature to note for those familiar with the idea of decentralized networks and the fediverse: while Bluesky is decentralized, it’s not technically part of the fediverse. That’s because Bluesky’s AT Protocol is different from ActivityPub, the open protocol that fediverse platforms like Mastodon and Threads leverage.
In a nutshell, Buffer allows you to share your Bluesky content on the fediverse, too, if you cross-post to Mastodon.
Sound good? Whatever your mission with Bluesky, here’s how to connect your Bluesky account to Buffer and start posting.
How to connect your Bluesky account to Buffer
First things first. Before you can do any of the above, you’ll need to add Bluesky as a channel in Buffer (which shouldn’t take you more than a few minutes).
Sign in to Buffer (if you’ve not yet signed up, no sweat — you can do that for free here).
In a new tab, sign in to Bluesky.
In Buffer, navigate to publish.buffer.com. On the left-hand side of the screen, click the ‘New Channel’ button underneath your channels list.
From the channels list, click the ‘Connect’ button next to Bluesky.
This will open the dialogue box below:
Leave your Buffer tab open, and navigate to your Bluesky tab. Click the profile icon on the left-hand side to go to your profile page.
At the top of the page under your name, you’ll find your Bluesky handle. Unless you’ve customized your domain, it should look something like this: @yourname.bksy.social.
Copy that over to the dialogue box you left open in Buffer.
Now head back to Bluesky. Click on the settings cog on the left to navigate to the Settings menu. Scroll down to the Advanced section to find the ‘App Passwords’ option.
Click ‘Add app password.’
This will open a dialogue box that allows you to create a new app password. You can stick with the default password name or create your own. (Note that this is not your login password — it’s more like a key that will unlock Bluesky for your Buffer account.)
Your password will appear in the next window. Copy that and head back to Buffer, where you can paste it into the ‘Bluesky App Password’ box. Now, the window will look something like this:
Click ‘Next’ and you’re all done! Congratulations — your Bluesky account is now connected to Buffer.
How to schedule and cross-post on Bluesky
There are many routes to creating a new post in Buffer. For ease, we’ll start by using the ‘New Post’ button on the top right of publish.buffer.com, but you can also click the ‘+’ icon next to the channel in your channels list, click on any slots in the calendar, or click on any slots under the queue.
The process will be similar for whichever ‘create’ option you choose.
Log in to Buffer, then click on the Publish tab at the top.
Click the New Post button on the top right.
In the composer window, be sure to choose Bluesky from your channels list at the top. To crosspost, choose the other channels you want to publish to as well.
Add your text or media to the main composer window. If you’re cross-posting, you can customize for each platform by clicking within the boxes that correspond to each of the channels you’ve selected.
When you’re ready to post, click the ‘Add to Queue’ button to publish in the next available slot in each platform’s custom queue*, or click the drop-down to Share Now (publish right away), Share Next (publish in the next queue slot, bumping any posts already scheduled there into the next slot), or Schedule Posts (publish at a specific time).
To move your posts around, head to your calendar in Buffer and drag the post to a new slot, or hover over the post and click ‘Edit.’
With that, you’re all set! Your post will be published on your chosen platforms at your chosen times.
💡
*Each platform has a default queue in Buffer, but you can customize yours by clicking on a channel in your channels list > the little cog settings icon at the top of the page > Posting Schedule.
Getting started with Bluesky
If you’re new to the platform, we have a bunch of resources to help make things a little easier. Here’s my recommended reading:
I hope you found this explainer helpful and the process simple!
ℹ️
This post previously contained a workaround for scheduling your posts to Bluesky with Buffer and Apple’s Shortcuts. Now that Bluesky is available in Buffer, we’ll no longer be monitoring that workaround. (Scheduling with Buffer is far easier, anyway!)
Try Buffer for free
140,000+ small businesses like yours use Buffer to build their brand on social media every month
Traders always look for ways to increase profits and reduce risks. One effective tool that has changed trading is the use of custom bots or Expert Advisors (EAs) in MetaTrader 4 (MT4). These automated systems execute trades based on set rules, removing emotions from trading and keeping things disciplined. In this blog post, we will explain how to program custom bots for MT4, discuss their benefits, and show you how to get started. If you want to improve your trading experience, then check out our experienced and talented programmers. We offer programming services like programming MT4 Custom Trading Bots, modifying MT4 trading bots, programming trader’s ideas into MT4 EAs and Custom Trading Bots. For further questions, contact us at [email protected].
Introduction to MT4 Custom Trading Bots and Expert Advisors:
Custom trading bots and EAs are automated trading systems programmed to perform trading operations in MT4 environment. They are written in MetaQuotes Language 4 (MQL4), a language similar to C++, specifically designed for trading strategy development. These bots can analyze market conditions, execute trades, and manage trading positions without human intervention, based on the strategies encoded in them.
EAs can range from simple scripts that perform basic tasks like placing orders, to complex algorithms that incorporate complex technical analysis and risk management rules. The flexibility and power of EAs make them an invaluable tool for traders looking to improve their trading efficiency and effectiveness.
Benefits of Custom Bots in Forex Trading:
While manual trading offers a certain level of control, it comes with inherent limitations. Here’s why custom bots can be a powerful addition to your trading toolbox:
Eliminating Emotional Biases:
Trading decisions made in the heat of the moment can be detrimental. EAs, devoid of emotions, execute trades based on pre-defined rules, ensuring a disciplined approach.
24/7 Market Monitoring:
Unlike humans, EAs can tirelessly monitor markets around the clock, capitalizing on fleeting opportunities that might slip through the cracks during off-hours.
Backtesting Strategies:
Before risking real capital, EAs allow you to test and refine your trading strategy using historical data. This “backtesting” helps identify strengths and weaknesses, leading to better-informed decisions.
Consistent Execution:
EAs adhere to pre-defined rules, ensuring consistent execution of your trading strategy, regardless of market volatility. This eliminates the temptation to deviate from your plan based on emotions.
Benefits of Custom Bots by 4xPip:
4xPip offers its clients many advantages along with high quality services. We have more than 7 years of experience, working with 900+ clients in more than 80 countries with satisfying results. Some the benefits that you get by working with 4xpip is as following:
Optimization and Efficient Code:
We prioritize clean and efficient code. This does not only guarantee functionality but also enhances readability and maintainability. Well-Structured code allows for easier future modifications and ensures smooth operation of your MQL programs.
Back Testing Capabilities:
We understand the importance of backtesting and offer the ability to test your custom trading bots on historical data, allowing you to evaluate performance and customize them before deploying into the live market
Customer Support:
We prioritize client communication. Our programmers conduct meetings and zoom calls with the client to understand their trading approach, risk management and targeted markets.
Trading Knowledge:
It is very important for the programmer to know about the concepts of trading. Our programmers and developers have a detailed understanding of trading concepts, methods and strategies. This knowledge proves a great asset when programming custom trading bots and it ensures less errors
Summary:
Custom bots, or Expert Advisors (EAs), in MetaTrader 4 (MT4) are automated trading systems programmed in MetaQuotes Language 4 (MQL4). They enable traders to execute trades based on predefined rules, thereby removing emotions from trading and ensuring a disciplined approach. These bots can perform tasks ranging from simple order placements to complex algorithmic trading, incorporating technical analysis and risk management. Benefits of using custom bots include eliminating emotional biases, providing 24/7 market monitoring, backtesting strategies using historical data, and ensuring consistent execution of trading plans. Programming services for custom bots offer optimized, efficient code, robust backtesting capabilities, and comprehensive customer support to enhance trading efficiency and effectiveness. For further questions, contact us at [email protected].
FAQs
What are custom trading bots in MT4?
Custom trading bots, or Expert Advisors (EAs), are automated systems programmed to perform trading operations in MetaTrader 4 based on predefined rules and strategies.
How are EAs programmed in MT4?
EAs are programmed using MetaQuotes Language 4 (MQL4), which is similar to C++ and specifically designed for developing trading strategies.
What are the main benefits of using custom bots in trading?
The main benefits include eliminating emotional biases, providing 24/7 market monitoring, allowing for backtesting of strategies, and ensuring consistent execution of trading plans.
Can custom bots analyze market conditions?
Yes, custom bots can analyze market conditions and execute trades based on the strategies encoded within them.
Why is backtesting important for EAs?
Backtesting allows traders to test and refine their strategies using historical data, helping to identify strengths and weaknesses before deploying the bot in live markets.
Do custom trading bots work 24/7?
Custom trading bots can monitor and trade the markets around the clock, capturing opportunities that traders might miss during off-hours.
How do custom bots help in managing trading positions?
Custom bots manage trading positions by following the predefined rules and strategies, ensuring that trades are executed consistently and according to plan.
What is the significance of optimized and efficient code in custom bots?
Optimized and efficient code ensures that the bot functions smoothly, is easy to maintain, and can be modified easily for future needs.
How do programmers ensure the bots meet traders’ needs?
Programmers often conduct meetings and Zoom calls with clients to understand their trading approach, risk management preferences, and targeted markets to tailor the bots accordingly.
What kind of support is available for custom bot programming?
Comprehensive customer support communicates with clients in order to understand their needs, evaluates performance using backtesting capabilities, and ensures the smooth operation of the bots by providing ongoing assistance.
Traders always look for ways to increase profits and reduce risks. One effective tool that has changed trading is the use of custom bots or Expert Advisors (EAs) in MetaTrader 5 (MT5). These automated systems execute trades based on set rules, removing emotions from trading and keeping things disciplined. In this blog post, we will explain how to program custom bots for MT5, discuss their benefits, and show you how to get started. If you want to improve your trading experience, then check out our experienced and talented programmers. We offer programming services like programming MT5 Custom Trading Bots, modifying MT5 trading bots, and programming trader’s ideas into MT5 EAs and Custom Trading Bots. For further questions, contact us at [email protected].
Introduction to MT5 Custom Trading Bots and Expert Advisors:
Custom trading bots and EAs are automated trading systems programmed to perform trading operations in MT5 environment. They are written in MetaQuotes Language 5 (MQL5), a language similar to C++, specifically designed for trading strategy development. These bots can analyze market conditions, execute trades, and manage trading positions without human intervention, based on the strategies encoded in them.
EAs range from simple scripts that perform basic tasks like placing orders, to complex algorithms that incorporate complex technical analysis. The flexibility and power of EAs make them an invaluable tool for traders looking to improve their trading efficiency and effectiveness.
Benefits of Custom Bots in Forex Trading:
While manual trading offers a certain level of control, it comes with inherent limitations. Here’s why custom bots can be a powerful addition to your trading toolbox:
Eliminating Emotional Biases:
Trading decisions made in the heat of the moment can be detrimental. However, EAs, devoid of emotions, execute trades based on pre-defined rules, ensuring a disciplined approach.
24/7 Market Monitoring:
Unlike humans, EAs can tirelessly monitor markets around the clock, capitalizing on fleeting opportunities that might slip through the cracks during off-hours.
Backtesting Strategies:
Before risking real capital, EAs allow you to test and refine your trading strategy using historical data. This “backtesting” helps identify strengths and weaknesses, leading to better-informed decisions.
Consistent Execution:
EAs adhere to pre-defined rules, ensuring consistent execution of your trading strategy, regardless of market volatility. This eliminates the temptation to deviate from your plan based on emotions.
Benefits of Custom Bots by 4xPip:
4xPip offers its clients many advantages along with high quality services. We have more than 7 years of experience, working with 900+ clients in more than 80 countries with satisfying results. Some the benefits that you get by working with 4xpip is as following:
Optimization and Efficient Code:
We prioritize clean and efficient code. This does not only guarantee functionality but also enhances readability and maintainability. Well-Structured code allows for easier future modifications and ensures smooth operation of your MQL programs.
Back Testing Capabilities:
We understand the importance of backtesting and offer the ability to test your custom trading on historical data, allowing you to evaluate performance and customize them before deploying into the live market
Customer Support:
We prioritize client communication. Additionally, our programmers conduct meetings and Zoom calls with the client to understand their trading approach, risk management, and targeted markets.
Trading Knowledge:
It is very important for the programmer to know about the concepts of trading. Our programmers and developers have a detailed understanding of trading concepts, methods and strategies. This knowledge proves a great asset when programming custom trading bots and it ensures less errors
Summary:
Custom bots, or Expert Advisors (EAs), in MetaTrader 5 (MT5) are automated trading systems programmed in MetaQuotes Language 5 (MQL5). They enable traders to execute trades based on predefined rules, thereby removing emotions from trading and ensuring a disciplined approach. Additionally, these bots can perform tasks ranging from simple order placements to complex algorithmic trading, incorporating technical analysis and risk management. The benefits of using custom bots include eliminating emotional biases, providing 24/7 market monitoring, backtesting strategies using historical data, and ensuring consistent execution of trading plans. Furthermore, programming services for custom bots offer optimized, efficient code, robust backtesting capabilities, and comprehensive customer support to enhance trading efficiency and effectiveness. For further questions, contact us at [email protected].
FAQs
What are custom trading bots in MT5?
Traders program custom trading bots, such as Expert Advisors (EAs), to perform trading operations in MetaTrader 5 according to predefined rules and strategies.
How are EAs programmed in MT5?
EAs are programmed using MetaQuotes Language 5 (MQL5), which is similar to C++ and specifically designed for developing trading strategies.
What are the main benefits of using custom bots in trading?
The main benefits include eliminating emotional biases, furthermore, providing 24/7 market monitoring, as well as allowing for backtesting of strategies, and ensuring consistent execution of trading plans.
Can custom bots analyze market conditions?
Yes, custom bots can analyze market conditions and, therefore, execute trades based on the strategies encoded within them.
Why is backtesting important for EAs?
Backtesting allows traders to test and refine their strategies using historical data, helping to identify strengths and weaknesses before deploying the bot in live markets.
Do custom trading bots work 24/7?
Yes, custom trading bots can monitor and trade the markets around the clock, capturing opportunities that might be missed during off-hours.
How do custom bots help in managing trading positions?
The custom bots follow the predefined rules and strategies to manage trading positions, ensuring that they execute trades consistently and according to plan. Additionally, they analyze market trends to adjust their strategies as needed.
What is the significance of optimized and efficient code in custom bots?
Optimized and efficient code ensures that the bot functions smoothly. Additionally, it facilitates easy maintenance and allows for easy modification to meet future needs.
How do programmers ensure the bots meet traders’ needs?
Programmers often conduct meetings and Zoom calls with clients to understand their trading approach, risk management preferences, and targeted markets to tailor the bots accordingly.
What kind of support is available for custom bot programming?
Comprehensive customer support includes communication with clients in order to understand their needs, as well as backtesting capabilities for evaluating performance, and ongoing assistance to ensure smooth operation of the bots.
Selling gold and fine jewelry for top dollar can be time-consuming, as appraisal values can differ. Alloy Market strives to change the selling process so you can receive a competitive offer and quick payment.
Our Alloy Market review looks at how reassuring it can be to sell precious metals with a free shipping kit and video appraisal.
Summary
Alloy Market buys gold, silver, platinum, and palladium at competitive prices and same-day payments. Enjoy free insured shipping and a video appraisal to receive a trustworthy offer. You will work with a dedicated advisor and can sell broken or damaged pieces.
Pros
Free shipping kit
Video appraisal
Quick payments
No hidden fees
Cons
Pays less than melt value
Must mail items away
Low payouts for gemstones
Must accept offers within 48 hours
What is Alloy Market?
Alloy buys gold and precious metals through free and insured shipping, along with an assigned advisor for hands-on help. Selling your gold, silver, platinum, or palladium on this platform is free. Further, it offers to match a competitor’s offer or return your metals if you’re not pleased with the official appraisal.
You may appreciate this platform for a transparent selling process as you receive a video appraisal. This inspection method presents how Alloy appraises your metals and gems, while similar services may only send a written offer based on weight and purity.
Anticipate receiving payment as soon as the same day you accept the offer. The platform provides free return shipping if you decide to go with another of the best places to sell gold.
I like the hands-on and transparent process, as it adds a level of trust when selling hundreds or thousands of dollars worth of precious metals or fine jewelry. One potential hesitation is that Alloy only began in 2022 and has a limited track record. Nevertheless, it has many positive customer reviews and has successfully sold its valuables.
How Does Alloy Market Work?
You can mail your valuables to Alloy’s Pennsylvania-based warehouse. Below is a step-by-step guide to selling your metals safely and receiving a quick payment.
Free Appraisal Kit
First, you request a free appraisal kit that arrives by mail within five business days. You will pack up your eligible items and send them back using the U.S. Postal Service (USPS). The kit includes a prepaid postage label with up to $100,000 in shipping insurance.
You can sell the following metals for free:
Gold: Bars and bullion, coins, bracelets, chains, dental crowns, earrings, flatware, rings, watches, and watchbands.
Silver: Bars, jewelry, necklaces and chains, pure silver coins, rings, and sterling silver flatware.
Platinum: Bars, crucible, necklace, rings, and scrap wires.
Palladium: Bars, crucible, jewelry, rings, and scrap wires.
You can also sell diamond jewelry and settings containing semi-precious stones to potentially get a higher appraisal value. However, there isn’t a gem removal service, and you might be better off getting these removed before shipping off the metal.
As you’re essentially making the current spot price, avoid selling coins or jewelry with collectible value, as it can be worth more. Regarding gold and silver coins, Alloy only buys rounds that don’t cannot be used as currency.
Recorded Video Appraisal
While you must ship your valuables to the inspection center, you can view a recorded jewelry appraisal. It captures the unboxing and final offer so you know precisely what the appraisal is looking at to prevent confusion. Most appraisals happen within 24 hours of arrival.
The service can also implement X-ray technology and acid testing to validate the content’s purity. An item’s condition doesn’t impact the price as Alloy bases its offer on the metal’s quantity and purity.
Typically, mail-in appraisals only include an email offer upon receiving your shipment. However, it’s still a good idea to know the weight and purity of your metals before placing them in the shipping kit so that you can compare your estimates to the expert appraisal accurately.
I especially like watching a video of the appraisal, as I’m hesitant to mail my valuables off for a long-distance appraisal. It’s helpful to see how much value diamonds or gems can add during the appraisal.
Dedicated Alloy Advisor
You will work with the same advisor by phone and email from start to finish. The advisor can answer your initial questions as you prepare your inventory for shipping and appraisal.
Your advisor can guide you through the appraisal and payment process. For example, they can be your point of contact if another gold-buying service offers a more competitive offer, and you see if Alloy can match it.
This convenient access to a precious metals expert yields confidence as hands-on help is available at your fingertips.
Same Day Payments
Anticipate receiving a final offer the same day that Alloy receives your metals. Same-day payments are available through PayPal, Venmo, and wire.
At most, it takes 24 hours from the arrival time for an expert to assess your gold and silver. Payment will be released as soon as you accept your offer, although it can take several days if you opt for direct deposit or paper check compensation.
You have 48 hours to accept the appraisal offer by phone and email. If you don’t respond, Alloy automatically sends the funds using your preferred payment method.
Free Return Shipping
You are not required to accept the final offer. If you reject it, Alloy will return your items free of charge and with up to $100,000 in shipping insurance.
Free return shipping is a common practice among online gold exchanges, and this feature builds further credibility. It also removes the pressure to accept an undesirable offer or pay unnecessary fees when you need money now.
I also appreciate that Alloy uses USPS for its shipping needs, while competitors might partner with FedEx or UPS, which can be more inconvenient. This means it’s easier to mail off your items and get them back at a street address or postal box.
What are the Fees Involved?
There are no fees, as you receive a prepaid shipping label, at least $5,000 in shipping insurance, and free return shipping. While it’s not a hidden fee, it’s vital to remember that your final offer is below the spot price, as Alloy must sell the metals to a refiner at market value and offset operating expenses.
Some same-day payment methods may incur service fees that your digital wallet or bank charges. Review the fee schedule if you desire PayPal, Venmo, or wire transfer payouts.
How Much Money Can You Make?
Your offer value is at least 65% of the spot metal value. Pure gold with a 24k purity receives the highest percentage, with a minimum valuation of 90.5%.
Appraisal values for any accompanying diamonds and gems are on a case-by-case basis. Primarily consider Alloy to sell your precious metals and view any proceeds from gems as bonus income.
Alloy routinely offers bonuses, and promo code offers that can boost your payout potential closer to the melt value. You can review any active offers by contacting your advisor or emailing customer support.
Most gold earrings, necklaces, and rings sell for $150 to $300. More luxurious pieces appraise between $400 and $2,000. The spot melt value depends on the weight and purity without factoring in the condition or collector’s demand.
Anticipate earning less when selling silver, as its spot price is lower than gold’s. However, you can still make a small fortune in cash by selling several pieces.
Many services don’t disclose their minimum payouts. As a result, it’s simple to estimate your income potential.
How Do You Get Paid?
Payment methods and the corresponding payment speeds are the following:
PayPal: Immediately
Venmo: Immediately
Wire transfer: Same day
ACH or direct deposit: 2-3 business days
Mailed check: 7-14 business days
Alternatives to Alloy Market
You may decide to compare offers from these platforms to make sure you earn top dollar:
Cash for Gold USA: Sell gold, silver, and diamonds with free, prepaid shipping and up to $5,000 in complimentary insurance. You can receive a 10% bonus on your first shipment. Same-day payment is available, along with free return shipping.
Express Gold Cash: Enjoy up to $100,000 in free, insured overnight shipping via FedEx and receive payment within 24 hours of appraisal. This platform has over 25 years of buying experience, free appraisals, and cost-free return shipping.
Worthy: Consider this platform to sell high-end jewelry and precious gems with collectible value. Prepare your items for auction using free shipping and professional cleaning. You pay a small success fee on sold items but can earn more than the melt value.
Frequently Asked Questions
Below are several questions to consider when determining if Alloy is worth it.
Is Alloy Market legit?
The Alloy Market offers many confirmed payouts at a competitive rate. Customers praising its fast processing speeds, free shipping, and no hidden fees give it an excellent Trustpilot rating. Its customer satisfaction score is higher than that of several competitors.
Does Alloy Market pay the spot price?
Unfortunately, the minimum payout is 65% of the spot metal value and as low as 90.5% for 24k gold and bullion. Both payouts can be higher with promotions and promo codes. These payouts are competitive with similar platforms and can be higher as some buyers may only offer 30% of the melt value.
Does Alloy Market buy broken jewelry?
Yes, it’s possible to sell broken and damaged jewelry as long as it’s made of gold, silver, platinum, or palladium. The appraisal value solely depends on the metal’s weight and purity instead of the functionality and collectibility.
What are the Alloy Market customer service options?
Phone and text support are available weekdays from 9 a.m. to 5 p.m. Eastern, and email support is also available. Active sellers can work directly with an advisor during the entire selling process.
Summary
Valuations can vary significantly when selling gold, silver, and precious metals. Alloy Market practices honesty and extensive hands-on help so you can be confident in receiving the most money for unwanted jewelry and scrap gold or silver.
It’s easy to start with a free shipping kit and an obligation-free appraisal to see how much your precious metals collection is worth.
Gmail isn’t the only ISP playing the tabbed inbox game. Yahoo Mail, Outlook, and Apple Mail have created their own versions of auto-sorted inbox tabs—including their own versions of Gmail’s Promotions Tabs.
Yahoo Mail has what it calls Views:
View
Email type
Receipts
Bills and receipts
Subscriptions
Newsletters and mailing lists
Shopping
Promotional emails
Outlook has what’s called the Focused Inbox feature which separates the inbox into two tabs: Focused and Other. The Focused tab contains the most important emails, while the Other tab contains the rest.
Apple Mail has taken a similar approach to Yahoo Mail and Gmail with its own version of the tabbed inbox, by using machine learning it will classify emails into categories such as:
Category
Email type
Primary
Time-sensitive emails from people the user might know and other important information
Transactions
Receipts and order confirmations
Updates
Newsletters and emails from social media networks
Promotions
Marketing and sales-related emails
One thing to keep in mind: just because an email lands in Gmail’s Promotions tab doesn’t mean it’ll land in Apple’s Promotions tab. Each ISP has its own way of identifying and sorting emails into tabs. And currently, there’s no way to identify with 100% certainty which tab your emails are being delivered to.
This method helped us boost new subscriber numbers across our diverse range of newsletters.
“With Apple now introducing it’s own version of tabs in email, it will be a much more universal email inbox user experience. Marketers need to focus on the content and the email envelope. As has always been the case, if your emails are engaging and a user interacts more with them, then the higher likelihood of it being top of the inbox—in any ‘tab’.”
What are the benefits of the Promotions Tab for email marketers?
The creation of the Promotions Tabs across all of the different ISPs not just Gmail’s Promotion Tab is a user-centric move by ISPs. But it also has huge benefits for email marketers, too:
1. Tab browsers are in the buying mindset
More often than not, users who are browsing the Promotions Tab in their inbox are in the mood to buy. It’s a little bit like they’re window shopping and looking out for something to catch their eye to make them want to walk into the store—or open the email. The creation of the Promotions Tab has given marketers the opportunity to have an already rapt ready-to-buy audience.
2. Recipients won’t miss important messages
If you’re sending marketing or promotional emails, it’s highly likely you’re also sending other kinds of emails like transactional emails (order confirmation, forgotten password, etc.).
If you’re sending transactional emails from a different sender email address than your marketing/promotional emails (something we highly recommend!), recipients of your emails who have a tabbed inbox set up will be able to receive those different types of emails in different tabs, ensuring they will never miss those important emails.
3. Customized deal badges to stand out in the inbox
When you send a promotional or marketing email and it’s delivered to Gmail’s Promotions Tab, Gmail users who use the Gmail app on their mobile device may see additional imagery pulled automatically from your email—before they’ve even opened it. This is known as Gmail Annotations and there are a couple of different ways you can use them. (Skip ahead to the section to see how!)
Are your Gmail open rates dropping?
When seeing a drop in open rates in from your subscribers who use Gmail, brands often blame the Promotions Tab for it and try to fix the issue by tricking their way into the Primary Tab. This only makes the problem worse.
Gmail’s filtering is engagement-based—not brand-based—so it learns from subscribers’ actions and customizes the inbox experience based on that.
If Gmail users are marking your emails as spam, unsubscribing, or generally not opening and clicking, Gmail may see this as a sign that their users aren’t interested in your emails. This is when Gmail may start placing them into the spam folder.
Let’s spell this out to make it even clearer: by tricking Gmail (or any other ISP) into believing your emails are in fact not promotional or marketing emails, but important and critical emails that need to be delivered to the Primary Tab, you’re potentially creating a point of friction between your brand and the recipient in the inbox.
If users don’t expect your email to appear in the Primary Tab but they start appearing there, there’s a higher chance your emails will be ignored, unsubscribed from, or even worse—marked as spam. As marketers, it’s not our job to dictate how our emails are seen (or not seen). However, it is our job to ensure our brand is putting its best foot forward in the inbox, by abiding by how users want to engage with emails in their inbox.
It’s also worth noting that Gmail has not—so far—shared any data on how many users actually use the Promotions Tab. In fact, in a survey run by ZeroBounce for their Email Statistics Report, revealed while 25% of those surveyed said they never check their Promotions Tab, another 22% said they don’t have one and then a whopping 53% said they either check their Promotions Tab every day or sometimes. The Promotions Tab should never be seen as the first cause of alarm when open rates drop.
Promotions Tab features and how to use them
So your emails are landing in the Promotions Tab, huh? Huzzah! You’ve got a wealth of opportunities to make the most of your time in this wonderful place.
Gmail will automatically pull in information from your emails to create a Promotions Yab preview on mobile devices, so you can control what your recipients see with annotations. Here are a couple of ways you can annotate your email:
Product carousel
You shouldn’t rely on open rates to track email performance, and Gmail’s product carousel doubles your chances to increase clicks. In addition to linking to products within your email, you can display up to 10 product cards that link directly to the listing on your website. The cards also allow you to stand out in the inbox with eye-catching images, product names, and prices.
Another way to catch subscriber attention in the inbox is with Gmail deal annotations. You can describe the offer (like 10% off), share a promo code, and include a sale end date below your subject line and preview text. Adding deal annotation effectively doubles the information you can use to entice someone into your main message.
Optimizing emails for the Promotions Tab is no different to optimizing emails in general.
1. Clearly identify your brand
Along with implementing annotations to help your email stand out in Gmail’s Promotions Tab, our number one tip to you is ensure your sender name is clear. What do we mean by clear? It should clearly state your brand name so that all of those window shopping Promotions Tab browsers can quickly identify your brand in their inbox.
2. Send valuable and relevant content
You also need to ensure your subscribers or customers will keep coming back to every single one of your emails in the Promotions Tab, so make every email count by creating stunning emails that are packed with personalized, relevant content to build a strong relationship between your brand and recipient. Make sure that after every email open, your subscribers feel like the email was worth it—even if they didn’t click through that day.
3. Implement BIMI
Brand Indicators for Message Identification (BIMI) is an email specification allowing you to display your logo next to your emails, which makes them quickly recognizable in the inbox. On top of grabbing subscriber attention, having your official logo next to your Promotions Tab email preview builds trust that you are who you say you are.
The text in your deal badge needs to be clear and concise. Opt for something like “15% off everything” or “free shipping” instead of “Big discounts on all of our new arrivals.”
5. Use the correct image format
Gmail has a few guidelines for choosing the best images for your product carousel:
Avoid text
Use a 4:5, 1:1, or 1.91:1 aspect ratio
Don’t repeat images between emails
HTTPS (not HTTP) for image URLs
6. Leverage expiration dates
Including expiration dates in your promo tab email annotations gives you two opportunities to preview in the top picks section—when you send it and within three days of the expiration date. That means you should include a correctly formatted expiration date for limited-time deals for maximum reach.
This method helped us boost new subscriber numbers across our diverse range of newsletters.
“My best advice is if you’re a promotion, be promotional! Don’t try to avoid being classified as a promotion, be a promotion! If your emails aren’t driving revenue, work with your CFO to create offers that will drive revenue.”
Being trusting and kind are good traits, but scammers like to take advantage of that. It’s important to know when to proceed with caution. There are already plenty of Costco scams to keep an eye out for, and now online forums suggest another might be emerging. It hinges on Costco members sharing their membership cards. Of course, even without the possibility of fraud, you shouldn’t let others…
Us marketers know that marketing according to data points alone isn’t enough to get meaningful engagement—that’s the job of a buyer persona.
While demographic survey results are great, many factors of customer behavior are needed to create a well-rounded and detailed buyer persona.
In this piece, I’ll explain what a buyer persona is and show you how to combine different research methods to form and create detailed buyer personas. In just a few thoughtful steps, you’ll walk away with consumer stories and profiles representing your customer base.
What is a buyer persona?
A buyer persona is a representation of your ideal customer that you create from audience and market research. Personas include essential information about your target customer (like demographics, behavior, interests, challenges, etc.) and help you better reach them and meet their needs.
The strongest buyer personas are based on market research and insights you gather from your existing and potential customer base (through surveys, interviews, etc.).
Buyer personas are unique to every company, and so is their name for them. You may see buyer personas referred to as “customer personas,” “marketing personas,” “audience personas,” or “target persona.” Each has the same meaning but will look unique to your company.
You might have as few as one or two personas, or even 10+; it all depends on your business.
What type of business needs to create buyer personas?
All types of businesses should create (and will benefit from) buyer personas because every business needs customers or clients to be successful.
What is a negative buyer persona?
While a buyer persona represents your ideal customer, a negative—or exclusionary—persona represents who you don’t want as a customer.
Your negative personas can include:
Customers who are too advanced for your product or service
Potential customers who are just too expensive to acquire
People who only engage with your content to gain knowledge
Whatever the exclusion factor is, the knowledge is valuable because it helps you narrow down your strategic execution so that your inputs directly contribute to your results.
Why are buyer personas important to your business?
According to our research, most marketers lack crucial information about their audience, so they struggle to make personalized content.
Before diving into the buyer persona creation process, let’s pause to understand the impact of well-developed buyer personas on your business (specifically, your marketing efforts).
1. Buyer personas help you personalize your marketing.
Personalization is the main reason your buyer personas are essential, and it’s only possible when you truly understand your audience. Customers appreciate personalization, as 96% of marketers say it increases the likelihood of buyers becoming repeat customers, and 94% say it increases sales.
Those stats represent my experience as a consumer: I’m more likely to be a fan of and give repeat business to brands that know what I like and cater to my interests. For example, a brand email that lets me know a product on my wish list is on sale will, more likely than not, turn me into a loyal and appreciative customer.
2. Buyer personas inform product development.
Extensive research into your target customer helps you with your product development process. You’ll know what your ideal customer experiences on a day-to-day basis, which can inspire innovative improvements to your product.
So, for example, say I sell kitchen utensils. My buyer persona research tells me my ideal customer lives in the South, where grilling is common. I would likely find success developing and offering grilling utensils or improving my existing offerings to work in indoor and outdoor environments.
3. Buyer personas enable the optimization of demand generation, lead generation, and lead nurturing content.
Buyer persona research tells you how your ideal customer wants to hear from you, which can influence your demand generation strategies.
For example, if your target audience prefers SMS communication, you might respond by creating SMS lead nurturing campaigns instead of emails.
4. Buyer personas help you tailor your product’s messaging to its target audience.
Completed buyer personas help you tailor your content, messaging, product development, and services to meet your target audience’s specific needs, behaviors, and concerns. This ties back to the personalization I mentioned before: when you speak to your audience with your marketing campaigns, you’re more likely to be effective. In fact, marketers who offer customers a personalized experience are 215% more likely to say their marketing strategies are effective than those who don’t.
How can buyer personas be used in marketing?
Developing personas lets you create content and messaging that appeals to your target audience and personalize your marketing to different audience segments.
For example, instead of sending nurturing emails to your entire database, you can segment by buyer persona and use a tool, like Marketing Hub, to tailor messaging to what you know about each one.
When combined with lifecycle stage, personas let you map out and create highly specific content. (You can learn more about how to do that by downloading our Content Mapping Template.)
Buyer personas are also an excellent tool if you target a niche audience. I run Breaking the Blueprint (BtB), a blog column for minority business owners and entrepreneurs, and the target audience is more specific than the general HubSpot Blog (Black entrepreneurs vs. entrepreneurs as a whole, for example).
Since the target audience is unique, I conducted buyer persona surveys to learn more about their specific interests, needs, and pain points to make sure the content I publish is much more likely to make an impact and be helpful.
And, if you take the time to create negative personals, you’ll have the advantage of segmenting the “bad apples” from the rest of your contacts, saving you money and increasing productivity.
Types of Buyer Personas
While developing your personas, you may ask yourself, “What are the different types of buyer personas?” From there, it’d be simple to adjust one for your business — right?
That’s not exactly how it works. Since every business (no matter how many competitors they have) is unique, their buyer personas are unique.
Yes, there are standard attributes you can apply to, say, specific age groups, but even those have variation. For example, my mom’s generation overwhelmingly prefers traditional marketing tactics, but she loves Instagram Reels more than anyone I know.
There isn’t a list of universally recognized buyer personas to choose from, nor is there a standard for the number of personas you need. If you’re new to personas, I recommend starting small. You can always develop more as you grow.
In general, companies may have the same or similar categories for their buyer personas (e.g., a marketer, an HR rep, an IT manager, etc.). But your business’s different personas and the number of them it requires depend on your target audience and what you offer your customers.
This explains why buyer personas are so important: they’re uniquely put together to help your specific business achieve its goals.
What goes into persona development?
We’ve discussed the importance of buyer personas and their different types; now, let’s discuss how you can develop your own.
The main component of buyer persona development is research. Once you’ve done your research, you look for patterns and turn those patterns into actionable tips and strategies you include in your buyer persona.
You’ll also form the team that will play a role in your process. A great place to start is choosing a representative or two from relevant customer-facing teams, especially sales and marketing. Salespeople have direct communication with customers and insight into their needs, and marketing teams have data about customer behavior.
Once you’ve identified stakeholders, you’ll start conducting your research and gathering your data. Then, you’ll compile your personas and start using them for your marketing campaigns.
Ready to start creating your buyer personas? Let’s dive in.
How to Create a Buyer Persona In 5 Steps
High-quality buyer personas are based on concrete facts about your audience’s interests, behavior, and demographics.
So, the best way to create your buyer personas is through research, surveys, and interviews—all with a mix of customers, prospects, and those outside your contacts database who align with your target audience.
When I created personas for Breaking the Blueprint, I discovered helpful and practical methods for gathering the information you need to develop your personas (you can also further your knowledge on this topic through the free HubSpot Academy course). Let’s dive in.
1. Research your customer
Research is the basis of your buyer persona. Without it, personas are based on assumptions.
The information you want to get from your research includes:
Demographic info (age, gender, education, location, etc.), to get a foundational understanding of who your persona is.
Behaviors (needs, purchasing behavior, brand loyalty, decision-making process), which lets you know how people behave as customers, what they respond to, and how they like to interact with preferred businesses.
Psychographic information (lifestyle, values, interests), which gives you information about any factors influencing decisions, motivations, and behaviors.
Goals and objectives, which tells you how your product or service relates to what they’re attempting to achieve.
Pain points and challenges, which tell you the issues that your persona faces, how your product or service is a solution to their needs, and how to position it as that.
Industry/professional information, like job title and responsibilities, tools used, industry, and company size, to get a sense of how you fit into their work day (if applicable).
You can separate your research process into two categories: your existing customers and everyone else.
I do want to note that, when collecting demographic information, some people are more comfortable disclosing personal information privately, or some might not want to at all. I recommend making it optional unless it’s a pivotal part of your buyer persona.
Existing Customers
If you already have customers, they’re the best place to start. If you’re building your persona for a new business, you can scroll down to Everyone Else.
You can conduct interviews (face-to-face or otherwise) and send out surveys to learn why they’re your customers. Responses will help you create value propositions and selling points for marketing materials that speak directly to your audience’s interests.
Your historical business data and analytics also offer a wealth of information about your current customers’ purchase history, touchpoints and interactions, preferred channels, etc. You can also:
Check your website traffic analytics to identify useful information about your existing audience, such as demographics, which pages attract the most visitors and why, and what marketing campaigns drive the most traffic.
Consider your sales team’s feedback on the leads they interact with most. What generalizations can you make about the different types of customers you serve best?
Analyze customer feedback and support requests.
If you’re having direct conversations, I find it helpful to include descriptive buzzwords and mannerisms you pick up on. This can help your team identify certain personas when talking to prospects.
Everyone Else
Everyone else includes existing leads, prospects, people who have never heard of you, and even those who are negative buyer personas.
I recommend researching these groups second (unless you’re a new business) because you’ll already have a sense of what your ideal customer looks like from the information you’ve gathered about your existing customers. You’ll be more focused on who you talk to and where you look for people to talk to.
Your research into everyone else can include the same things you employed for current customers, as well as:
Focus groups.
Look through your contacts database to uncover trends about how certain leads or customers find and consume your content.
Social listening to see what people talk about online in relation to what you offer, your competitors, and industry as a whole.
Customers who have churned and left feedback on their reasoning.
Now, how do you use your completed research to create your persona? Analyze the information.
2. Analyze available information
Once you’ve gone through the research process, you’ll have a lot of meaty, raw data about your potential and current customers. But what do you do with it? How do you distill all of it so it’s easy for everyone to understand all the information you’ve gathered?
Identify patterns and commonalities in your research. Answers to your interview questions, information submitted in lead forms, and insight from the sales team will all help you understand how to be the most relevant to your persona so you can draw them in.
3. Build your persona
Once you’ve gone through your research and found those patterns, it’s time to start building your persona. HubSpot’s free Make My Persona generator, as well as our free downloadable persona templates, can help you organize the information you’ve gathered and share it with relevant stakeholders so everyone can develop an in-depth understanding of the people they’re targeting at work.
You can also use this video as an instructional resource.
With our template, the first step is to fill in your persona’s basic demographic information. I recommend this, regardless of the template you use.
Here’s an example of how you might complete Section 1 in your template for one of your personas:
The second step is to outline what you’ve learned about your persona’s motivations. This is where you’ll distill the information you learned from digging into the “why” during your research.
What keeps your persona up at night? Who do they want to be? Most importantly, tie that all together by telling people how your company can help them.
3. Help your sales team prepare for conversations with your persona.
The personas you create can be even more impactful when you include real quotes from interviews that exemplify what your audience is concerned about, who they are, and what they want. This is where the buzzwords and mannerisms you might have noted during interviews can come in handy.
You can also create a list of the objections they might raise so your sales team can prepare to address those during conversations with prospects.
Tell people how to talk about your products/services with your persona. This includes the nitty-gritty vocabulary you should use and a more general elevator pitch that positions your solution in a way that resonates with your persona.
This will help you ensure everyone in your company speaks the same language when conversing with leads and customers.
Finally, make sure you give your persona a name (e.g., Finance Manager Margie, IT Ian, or Landscaper Larry), so everyone internally refers to each persona the same way, allowing for cross-team consistency.
Your buyer personas are essential, and so is regularly reviewing and updating them if necessary. I’d recommend and annual review to stay on top of your target audience and how their preferences evolve.
How to Find Interviewees for Researching Buyer Personas
One of the most critical steps to establishing your buyer persona(s) is finding people to speak with to understand who your buyer persona is.
But how do you find these interviewees? There are a few sources I recommend tapping into.
1. Use your current customers.
Your existing customer base is the perfect place to start your interviews. They’ve already purchased and engaged with your company and exemplify your target persona(s).
Don’t just talk to people who love your product and want to spend an hour gushing about you (as good as that feels). Customers who are unhappy with your product will show other patterns that will help you form a solid understanding of your personas.
For example, you might find that some of your less happy customers have bigger teams and need greater collaboration functionality from your product. Or, maybe they find your product too technical and difficult to use. In both cases, you learn something about your product and what your customers’ challenges are.
Another benefit to current customers is that you don’t always need incentives (e.g., gift cards) because they like being heard. Interviewing gives them a chance to tell you about their challenges, what they think of your product and to have an impact on the products they use.
Involving them in interviews can also deepen their loyalty to your company. When you reach out, always be clear that your goal is to get their feedback and that you highly value it.
2. Use your prospects.
You can also interview people who have not purchased your product and know little about your brand. Your prospects and leads are great options because you already have their contact information.
I recommend using the information you do have about them (i.e., anything you’ve collected through lead gen forms or website analytics) to figure out who fits your persona. Tools like Enlyft can help you create custom buyer persona profiles and match your prospects to them to make it easier to find the people you need to talk to.
3. Use your referrals.
Your existing network (coworkers, existing customers, social media contacts, etc.) is a great resource for finding people you’d like to interview and getting an introduction. You’ll likely get some high-quality interviews with this method, but volume can be lower. Referrals are especially beneficial if you’re heading into new markets or starting fresh without leads or customers.
If you don’t know where to start, I suggest searching on LinkedIn for people who may fit into your target personas and seeing who you share connections with, and reaching out to them for introductions.
4. Use third-party networks.
Third-party networks can help you recruit interviewees completely removed from your company. For example, UserTesting.com lets you run remote user testing, you just have less control over the sessions you run.
Let’s go over some tips for recruiting interviewees once you find them.
Tips for Recruiting Buyer Persona Interviewees
As you reach out to potential buyer persona interviewees, here are my tips for improving response rates and running smooth interviews.
Decide how many people you need to speak to: I wish I could give a set answer, but the number of people you need to interview for a well-rounded persona will vary. I recommend starting with at least three to five for each persona you create and make sure it’s a mix of customers, prospects, and people who don’t know your company. If you reach a point where you can predict what an interviewee is about to stay, you probably have a good enough sample and can call it.
Create your questions beforehand: After the small talk, you’ll jump into your questions. You want to have your persona interview questions ironed out ahead of time for a seamless interview process; otherwise, you risk looking disorganized and losing attention.
Use incentives: Incentives give people a reason to participate, especially those who don’t have a relationship with you. A simple gift card is an easy option.
Make it clear that it isn’t a sales call: This is especially important when dealing with non-customers weary of getting stuck on a sales call. Explain that you’re researching and what to learn from them, not sell to them.
Make it easy to say yes: Take care of everything for your interviewees so they only have to say yes. Suggest times, and be flexible so they can pick what works best for them.
The image below is a B2B buyer persona for someone who works in HR. The persona paints a clear picture of the target customer’s struggles and how the business can best meet those needs. In this case, HR recruiting tools streamline processes, make recruiting easier, and help HR expertly manage their overall job duties.
B2C Buyer Persona Example
The image below is a B2C buyer persona for a music streaming service.
Based on this persona, a streaming service would want to ensure that it has a user-friendly mobile app, sends new music notifications, and makes it easy for users to discover new music related to their interests and share content with friends.
Create Your Buyer Personas
Creating buyer personas helps you understand your target customers on a deeper level and ensures everyone on your team knows how to best target, support, and work with your customers. When you use your personas to guide decisions, I don’t doubt that you’ll see improvement in your reach, boost your conversions, and increase customer loyalty.
Editor’s note: This post was originally published in May 2015 and has been updated for comprehensiveness.
Carbon accounting – also known as a carbon or greenhouse gas inventory – is the process of measuring the amount of carbon dioxide, or other greenhouse gas (GHG), an organization emits. The aim is to help the entity understand its climatic impact.
Carbon accounting is a must for any becoming business today. The process helps organizations highlight and target high GHG emitting operations with emission reduction strategies. Such businesses better meet the demands of the regulatory environment while coming into alignment with investor, consumer, and employee preferences.
As such, in 2022 81% of S&P 500 companies reported their own emissions (scope 1), and the emissions of the electricity they bought (scope 2). In addition, globally, over 22,000 companies disclosed environmental data – with a focus on business emissions – to the Carbon Disclosure Project (CDP) in the same year.
Your business too needs to understand where your emissions are coming from and the volume exuded, to then devise and implement an effective GHG reduction program. And to do that, this Green Business Bureau is your guide.
In this guide, we focus on the application of carbon accounting at the business level. We explain fundamental concepts and terminology with the recognition that this understanding is vital to accurately quantify business emissions. We then deliver an 8-step process to track, measure, and report the GHG emissions associated with your business and related operations. To conclude, we discuss the most recent developments in carbon accounting, as the discipline continues to evolve with ongoing research and a greater understanding of the concept.
Use the links provided to navigate through this article.
Carbon accounting describes a process that measures, records, and reports greenhouse gas (GHG) emissions. It’s a relatively new discipline born from the collective awareness that carbon dioxide emissions impact our climate.
Although this level was not defined by the convention, the aim was to allow ecosystems and society to adapt naturally to climate change, which means slowing global warming down. Since the convention’s establishment, the countries involved meet annually during the Conference of the Parties (COP). COP is a supreme decision-making body that aims to promote the effective application of the convention.
30 years later came COP 26 (2021) – held in Glasgow. COP26 brought together 120 world leaders and over 40,000 registered participants. Countries involved included the US, the UK, the European Union, and China. One of the main agreements made by COP26 was the commitment to end and reverse deforestation, along with securing global net zero targets by the mid-century and keeping 34.7°F (1.5°C) within reach.
The ongoing commitment towards UNFCCC – via COP – symbolizes how the political recognition of climate change has increased globally. There have been two significant events worth noting since the establishment of COP that are relevant to carbon accounting:
The Kyoto Protocol: The first meeting of the Conference of the Parties (COP1) took place in 1995 in Berlin. COP1 launched strict and precise commitments to mitigate climate change in what was named the Kyoto Protocol. The protocol sets binding and measurable objectives for combating climate change for the first time, stipulating global ceilings for GHGs.
The Paris Climate Agreement: COP21 took place in Paris 2015, and marked a new momentum for climate action. During COP21, leaders worldwide signed the Paris Agreement, which has the central aim of strengthening the global response to the threat of climate change. The Paris Agreement outlined the action necessary to limit global temperature rise this century below 35.6°F (2°C) (which is warmer than pre-industrial levels), and to cap further temperature increases to 34.7°F (1.5°C). The Paris Climate Agreement opened for signature on Earth Day (22nd of April 2016), at the UN headquarters in New York. 192 states and the EU – representing 98% of global GHG emissions – have ratified or acceded to the agreement. This includes China and the US (with president Biden’s remittance after Donald Trump’s previous withdrawal).
Today, the EU has set targets and measures for reducing carbon emissions. Among these is the Corporate Sustainability Reporting Directive (CSRD). The CSRD expects all large companies to report on their carbon emissions, and small and mid-sized businesses are likely to be included. The EU also expects claimed GHG emissions to be both audited and validated. In addition, in 2019 the UK introduced the Streamlined Energy and Carbon Reporting (SECR) standard, making it mandatory for large companies operating in the UK to annually report their energy and carbon emissions.
With these political shifts comes heightened regulatory demand for businesses to measure, track and report their GHG emissions.
In the United States, reporting on GHG emissions is mandatory for large GHG emitters. In addition, several states have their own more demanding legislation in place, such as California’s and Massachusetts’ Global Warming Solutions Act.
Plus we see these mounting regulations on a global level, far beyond the US and the EU. For instance, in 2007 Australia introduced the National Greenhouse and Energy Reporting Scheme (NGERS) to set mandatory emission reporting.
These changes in the political landscape create the first reason why carbon accounting is important: To stay ahead of the regulatory wave.
“Assess the scientific, technical, and socio-economic information relevant for understanding the risk of human-induced climate change – Cooperation with the IPCC
IPCC is a body that assesses and coordinates research into climate change occurring across the world.
In 1990, the IPCC published its first assessment report (FAR), which confirmed climate change is a threat to human life and stability. The IPCC estimates that the concentration of CO2 in our atmosphere has increased from 280 parts per million (ppm) – during the pre-industrial era – to 412.5 ppm in 2020. Such a rise has not been seen in the last 650,000 years, and never before has atmospheric CO2 increased as rapidly.
This increase in atmospheric carbon dioxide is associated – as predicted – with an average temperature rise. Yes, the Earth’s average temperature naturally oscillates. What’s different this time is humans are interfering with this natural rhythm and pushing it out of sync. For instance, our planet is currently heating up, when over the past 7,000 years, the average temperature has been decreasing at a baseline rate of 0.01°C per century.
The most recent IPCC report, published on Monday 28th February 2022, paints the bleakest picture yet regarding the impacts of climate change risk on ecosystems, wildlife, human health, society, and our economy. The report confirms that the widespread impact of global warming is being felt around the world. Once more, further impacts are in the pipeline even if emissions are cut to meet the most ambitious scenario targets.
“We also conclude that many future climate-related risks are more severe than previous IPCC assessments, increasing the urgency of cutting greenhouse gas emissions to limit future warming to as low as possible.” – Professor Richard Betts MBE, Met Office, and the University of Exeter and report lead author” – Prof Richard Betss MBE, Met Office, the University of Exeter and report lead author
Hence, to ensure resilient and stable planetary systems, our global economy must meet a 45-50% reduction in emissions by 2030, with the aim of achieving global net zero by early 2050.
With these targets in mind, 2015 marks a significant point in our history. As we mentioned, it was in this year that 192 countries (plus the European Union) signed the Paris Climate Agreement, to limit global temperature rise to 2°C (35.6°F) above pre-industrial levels by 2040.
As global leaders work to deliver a zero-carbon future, pressure mounts on business leaders to do the same. As such, during the fiscal years 2018 and 2019, half of the fortune 500 companies (F500) fully or partially reported GHG emission data. Plus, 60% of America’s largest companies have set at least one target to reduce GHG emissions.
In addition, a 2018-2019 Fortune 500 Greenhouse Gas Emissions Report calculated that the F500 was responsible for 13.34 billion tons of CO2e in 2018, and 13.15 billion tons of CO2e in 2019. Once more, a 2017 Carbon Major Report stated 50% of global industrial emissions can be traced to just 25 organizations (since human-induced climate change was officially recognized). Hence, businesses withhold the power to dent global GHG emissions and mitigate the effects of climate change. Keeping track of organizational emissions via carbon accounting is key to realizing this power.
CARBON ACCOUNTING PROVIDES LONG-TERM BUSINESS VIABILITY
A 2021 survey reported 83% of consumers declared that it’s very important for them to buy from a company that operates sustainably. In the United States alone, 56% of consumers will stop buying from companies they believe operated unethically – although this percentage has been obtained from research conducted in 2015, so may be outdated.
And it’s not just consumers that are demanding responsible businesses. For Gen Z (67%) and Millennials (64%) sustainability is a significant factor in an employee’s decision-making process when deciding where to work.
Investors, also, are demanding sustainability in business as practices design lower-risk investment options. For instance, one report by Bloomberg showed investors doubled sustainability-led capital in 2021. The same report also indicated investments are growing rapidly, and now represent almost one-third of all professionally managed assets globally.
Measuring, tracking, and reporting business emissions via carbon accounting represents a vital element for any business wanting to operate sustainably. Hence, carbon accounting helps businesses secure funding.
CARBON ACCOUNTING ALLOWS COMPARISON AND BENCHMARKING
Carbon accounting is not simply a case of tracking emissions. The purpose of carbon accounting is to help stakeholders derive meaningful insight, which means comparing an entity’s current emissions to historical datasets to illustrate improvements (or declines). Benchmarks should also be set to help companies track progress.
Plus, stakeholders can use a given entity’s emission reports to compare one firm to another and understand an organization’s relative performance.
Carbon accounting glossary: Understanding important terminology and concepts
The complexity involved in measuring, tracking, and reporting business emissions makes carbon accounting a daunting topic to tackle. Plus, as a fairly new discipline, the concepts, terminology, frameworks, standards, and practices continue to evolve. As such, it’s important you grasp the foundations of carbon accounting before measuring and tracking your organization’s emissions. And that understanding starts with defining the jargon.
Scope 1 emissions, as defined by the GHG Protocol, are GHGs released directly by the business in question by the burning of fossil fuels onsite. For simplicity, when defining scope 1 emissions, think burnt. To learn more about scope 1 emissions, head to our article GHG Protocol: Scope 1 Emissions Explained.
SCOPE 2 EMISSIONS
Scope 2 emissions, as defined by the GHG Protocol, are indirect GHGs released due to the energy purchased by the business in question. By energy purchased, we’re referring to electrical energy. For simplicity, when defining scope 2 emissions, think bought. To learn more about scope 2 emissions, head to our article GHG Protocol: Scope 2 Emissions Explained.
SCOPE 3 EMISSIONS
Scope 3 emissions as defined by the GHG Protocol are indirect GHGs released across an organization’s value chain. For simplicity, when defining scope 3 emissions, think beyond. To learn more about scope 3 emissions, head to our article GHG protocol: Scope 3 Emissions Explained.
The GHG Protocol outlines 15 categories that fall under scope 3 emissions. These categories are grouped as either upstream or downstream activities, and are as follows:
Upstream activities:some text
Business travel;
Employee commuting;
Waste generation;
Purchased goods and services;
Transportation and distribution;
Fuel and energy-related activities;
Capital goods;
Upstream leased assets.
Downstream activities:some text
Investments;
Downstream distribution and transportation;
Processing of sold products;
Franchises;
Downstream leased assets;
Use of sold products;
End-of-life retirement.
CARBON DIOXIDE EQUIVALENT (CO2E)
When dealing with emission data, you’ll emissions represented as carbon dioxide equivalents – CO2e. What does this measure mean?
A carbon dioxide equivalent is a standard unit for counting greenhouse gas (GHG) emissions regardless of whether they’re from carbon dioxide or another gas, such as methane.
As we know, GHG emissions are mainly carbon dioxide (CO2). But there are other GHGs that contribute significantly to human-induced global warming such as methane (CH4), nitrous oxide (N20), refrigerant gasses (HFCs, PFCs, and CFCs), sulfur hexafluoride (SF6), water vapor (H20), and ozone (O3).
These different GHGs have distinct fundamental structures and properties, meaning they have differing IR absorbing capacities and greenhouse gas effects. A gas’s IR absorption ability is captured in Global Warming Potential (GWP) measures.
Because CO2 is the main culprit when it comes to human-induced climate change, every GHG is translated into a CO2 equivalent. This translation is based on the global warming potential (GWP) of a given GHG – the higher the GWP, the higher the greenhouse gas effect.
The GWP of CO2 is 1, as CO2 is compared to itself. The GWP of CH4 is 21 according to the latest estimates. This means that 1 ton of CH4 has the global warming potential of 21 tons of CO2 – and so we would say 21 tons of CO2e.
EMISSION FACTOR
An emission factor (EF) is a multiplier that describes the volume of GHGs emitted during a given activity. High EF values define an activity that releases a large volume of GHGs into the atmosphere.
EFs are used because calculating exact measures for GHG emissions would exhaust both time and money. Hence companies calculate emission estimations based on activity data and the EF associated with that activity.
What do we mean by activity data?
Activity data represents production to reflect fossil fuel energy demand. For instance, the activity data could be the number of liters of diesel consumed, or the tons of iron ore used in an industrial process.
Activity data is then multiplied by the EF, which is calibrated to measure an activity’s CO2 equivalent. Hence EFs are represented by kg CO2e/accounting unit of activity. You can look up the emission factors associated with a given activity from IPCC’s emission factor database.
LOCATION-BASED APPROACH
The location-based approach is a carbon accounting method designed to help companies report their scope 2 emissions. Scope 2 emissions are calculated using a standard emission factor that’s set by the grid. The issue with this approach is that an organization’s specific emission reduction efforts aren’t captured, such as the purchasing of green power. To address this issue, the market-based approach was adopted, which we discuss later.
Using the location-based approach, an organization’s scope 2 emissions are calculated using the following measures:
Direct line emission factor;
Regional emission factor;
National emission factor.
These measures are defined below.
DIRECT LINE EMISSION FACTOR
A direct line emission factor is applied when an organization purchases electricity through a direct line connection with a known supplier – a direct line links an isolated generation site with an isolated customer. The organization should allocate a direct line emission factor to the portion of the electricity purchased from the specific known source.
REGIONAL EMISSION FACTOR
If an organization purchases electricity that’s delivered through a grid, the organization should use published emission factors based on the geographical location of each of its facilities. The regional emission factor is the average emission factor for the electricity generation facilities in a given region. Regional factors are available for several countries through national governments or other sources. For operations in the U.S., the recommended regional factors are the total output subregion grid factors published by the EPA’s Emission & Generation Resource Integrated Database (eGRID).
The EPA publishes an Emission Factors Hub that contains the most recent eGRID subregion emission factors. It must be noted that there’s often a delay between the release of the new version of eGRID and updates to the Emission Factors Hub. You can find the most recent version of eGRID, along with supporting documentation and resources here. If you don’t know what eGRID subregion your organization is located in, use the Power Profiler Tool to find out.
NATIONAL EMISSION FACTOR
If regional emission factors are not available, use the national emission factor, such as those published by national governments or the International Energy Agency.
MARKET-BASED APPROACH
The market-based approach instructs organizations to use more specific emission factors that account for the electricity mix sourced. With this method, if a business decides to derive a portion of electricity from a renewable energy supplier, then this will be reflected in an organization’s GHG inventory. Emission factors applied in the market-based approach include:
Energy Attribute Certificates – such as Renewable energy certificates (RECs);
Contracts;
Supplier-specific emission factor;
Residual mix factor;
Regional emission factor;
National emission factor.
The above terms are defined below.
RENEWABLE ENERGY CERTIFICATES (RECS)
Renewable energy certificates (RECs), otherwise known as a Guarantee of Origin, represent 1 megawatt-hour (MWh) of electricity generated from a renewable energy source, such as wind, solar, or biomass.
RECs are traded between the renewable energy supplier and the organization seeking to reduce its climatic impact.
BUNDLED AND UNBUNDLED RECS
Bundled RECs are sold alongside the electrical energy produced.
Unbundled RECs are sold separately from the electrical energy produced, which is instead, fed to the grid.
The purpose of unbundled RECs is to give organizations a cost-effective and flexible means of supporting renewable energy developments, and meet sustainability goals even if clean energy products are not available locally. By purchasing unbundled RECs, a business does not need to alter its existing power contracts. An entity can “cancel out” emissions from operations by financially supporting the renewable energy market. This hinges on the concept that greenhouse gas emissions (GHGs) mix globally in the atmosphere and that it doesn’t matter where GHGs are emitted, what matters is the overall impact an organization has on global GHG levels.
Bundled RECs, on the other hand, will have a direct impact on the buyer’s energy mix by providing renewable energy.
ENERGY ATTRIBUTE CERTIFICATES
An Energy Attribute Certificate (EAC) guarantees the energy’s origin is from renewables. A EAC electronically tracks the production, trade/distribution and consumption of renewable energy. The most common type of EAC is a REC – as previously explained. The emission factor associated with an EAC is based on the specific energy source that the certificate represents. As RECs use a renewable energy source, that emission factor is often set at zero. But they may also have a non-zero emission factor (e.g. if there is a fossil-fuel or biomass generation component).
CONTRACTS
An organization may have a contract, such as a power purchase agreement (PPA) as defined below, to purchase electricity from a specific generating facility. If there are no certificates (EACs) available indicating the amount of energy and emissions associated with this contract, then the contract itself will carry an emissions factor associated with the generation facility.
If certificates are issued to the generating facility then the emission factor is conveyed by the certificates rather than the contract.
If the certificates are bundled with the contract, then the purchasers can claim the emission factor.
If the certificates are sold to another entity, then the purchaser cannot make that claim, and the energy should be assigned the residual mix factor.
SUPPLIER-SPECIFIC EMISSION FACTOR
The supplier-specific emission factor is one that is reported by the utility provider. This emission factor must include all the electricity delivered by the supplier, including the electricity it generates and the electricity purchased from others.
RESIDUAL MIX FACTOR
Think of the residual mix factor as what’s left over. That is, the residual emission factor represents the emissions and energy generation that remain after certificates, contracts, and supplier-specific factors have been claimed and removed from the calculation.
POWER-PURCHASE AGREEMENT
A power purchase agreement, otherwise known as an electricity power agreement, is a contract – usually 5-20 years in length – during which time, the purchasers buy energy at a pre-negotiated rate. PPAs are fundamental in supporting independently owned electricity generators, especially producers of renewable energy such as wind or solar.
MARGINAL EMISSION FACTOR
A marginal emissions factor refers to the rate at which emissions would change dependent on the energy load.
For instance, say a town runs on 75% hydroelectric power and 25% on coal power. For inhabitants in this town, the electricity they receive is mostly clean. This could entice businesses wanting to operate via clean energy to move into the area. However, such a move will increase electricity demand on the grid. If that demand cannot be matched by an increase in hydroelectric power, then in effect, the business is operating on 100% coal-generated electricity. This is captured in a marginal emission factor. Hence, thinking in marginal rather than average carbon emissions can dramatically affect a company’s choices to reduce their climatic impact.
CARBON OFFSET
A carbon offset describes the reduction, or removal, of carbon dioxide or other greenhouse gas using a process that measures, tracks, and captures GHG emissions to compensate for an entity’s emissions exuded elsewhere. GHGs are captured using projects such as tree planting schemes, renewable energy infrastructure, carbon capture programs, or community-based sustainable developments.
Carbon offsetting works on the following principle: It doesn’t matter where GHG emissions are reduced or absorbed because GHGs mix globally in the atmosphere. Therefore, companies can partner with/pay other companies to help minimize their impact on the environment.
CARBON CREDIT
When a business invests in a carbon offsetting project, that business will receive carbon credits. A carbon credit is a transferable instrument, certified by governments or independent bodies, and represents a reduction in GHG emissions of one metric ton of CO2e. As such, a carbon credit is a generic term for any tradable certificate or permit. These represent the right to emit a set amount of carbon dioxide, or the equivalent amount of a different greenhouse gas.
An easy way to think about this is to imagine carbon credits as the tokens, or accounting language used to convey net climatic benefits from one entity to another.
Additionality is the defining concept of carbon offset projects. To qualify as a carbon offset, the emission reductions made as a result of the project must be additional to what would have happened if the project had not been carried out.
Grid additionally means production is accompanied by an additional source of renewable energy capacity.
EMISSIONALITY
Emissionality builds on the idea behind additionally. Emissionality quantifies a real-world drop in fossil fuel emissions, and is used by buyers of RECs to show their purchasing decisions are really driving a global impact.
ATTRIBUTIONAL CARBON ACCOUNTING
Attributional carbon accounting uses inventories of an organization’s emissions – scopes 1, 2, and 3 – with the aim of allocating “carbon budgets” to entities. With attributional carbon accounting, emission inventories are static and are allocated to a defined scope of responsibility. The aim is to establish emission quotas and to track emissions over time. The output of information is the quantity of GHGs released and/or removed from the atmosphere under the boundaries of the given entity.
CONSEQUENTIAL CARBON ACCOUNTING
Consequential carbon accounting (otherwise known as intervention accounting) quantifies the change in emissions caused by decisions, interventions, and projects. Consequential carbon accounting methods estimate the change in GHG emissions and/or removals from the atmosphere caused by a specified decision or intervention relative to a counterfactual baseline.
To illustrate the difference between attributional and consequential accounting, let’s consider an example. Say we have a brewery business that’s decided to use grain residues from the distilling process as fuel, substituting fossil fuels. With this change, the GHG emissions reported via the attributional carbon accounting method indicate a reduction in business emissions. However, livestock farmers previously relied on these grain residues as animal feed. Farmers now have to buy more soy meal, placing a higher demand on agricultural output in international markets, expanding deforestation. Under the consequential carbon accounting method, GHG emissions have increased.
SUPPLIER-SPECIFIC METHOD
The Supplier-Specific Method collects product-level cradle-to-grave GHG inventory data from the suppliers of goods and services. Using this method, an organization’s GHG emissions are calculated using the following formula:
Supplier activity x secondary emission factor
For instance, let’s say your business bought 200 iPads and wants to calculate the associated emissions. Using the supplier-specific method you’d use the secondary emission factor associated with an iPad which is estimated to be 78 kg CO2e per iPad, and then the number of iPads your business has purchased.
The supplier-specific method is used to estimate scope 3 emissions under the following categories:
Purchased goods and services;
Capital goods;
Fuel and energy-related activities;
Waste generated in operations.
PHYSICAL-UNIT METHOD
The physical-unit method calculates the GHG emissions based on the number of physical units purchased, plus measures for the energy consumed by those units. For instance, let’s say a company purchases 100 vehicles, and each vehicle consumes 10,000 liters of gasoline. Using the physical-unit method we can calculate the associated emissions using the following formula:
100 cars x 10,000 litres x 88.05 CO2e per litre = 88, 050,000 CO2e
The physical unit method can be used to estimate scope 3 emissions under the following categories:
Capital goods;
Purchased goods and services.
SPEND-BASED METHOD
The spend-based method calculates the financial value of a purchased good or service, then multiplies this by the associated emission factor to give the amount of GHG emissions produced per monetary unit. The following calculation is used in the spend-based method:
Cost (purchased goods or service) x emission factor
The spend-based method is recommended to calculate scope 3 emissions under the following categories:
Purchased goods and services;
Capital goods;
Upstream transportation and distribution;
Business travel;
Downstream transportation and distribution.
HYBRID METHOD
The hybrid method is recommended by the GHG Protocol to calculate scope 3 emissions. This method includes recording as much activity-based data as one can collect from the supply chain and then using the spend-based approach to estimate what’s left over.
Carbon accounting standards and frameworks
At present, there are no internationally recognized standards for measuring, recording, and reporting an organization’s GHG emissions. This can make it difficult for businesses to know how to account for their emissions. Many separate entities have developed programs that both promote GHG accounting/reporting while helping to define the ways in which it’s carried out. With this many standards and frameworks to choose from, it can be difficult to select ones that are right for your business. To help, we’ve detailed the most widely recognized standards and frameworks used in carbon accounting below. We recommend you choose more than one framework or standard to inventory your organization’s GHG emissions.
IPCC
The Intergovernmental Panel on Climate Change (IPCC) has provided several key principles that have been adopted by today’s carbon accounting standards. In this sense, the IPCC set a foundational framework to base carbon accounting standards on. Elements of this framework that are most consistently applied include transparency, accuracy, consistency, and completeness.
TASK FORCE ON CLIMATE-RELATED FINANCIAL DISCLOSURE (TCFD)
The Task Force on Climate-Related Financial Disclosures was created as a follow-up to the 2015 Paris agreement. The TCFD has established a framework of recommendations on the types of information companies should disclose to investors, lenders, and insurance underwriters.
SUSTAINABILITY ACCOUNTING STANDARDS BOARD
The IFRS Foundation’s International Sustainability Standards Board (ISS) encourages companies to keep using the SASB Standards. These standards enable organizations to provide industry-based sustainability disclosures about the risks and opportunities that affect enterprise value. Included in this is the tracking and reporting of an entity’s GHG emissions.
GLOBAL REPORTING INITIATIVE
The Global Reporting Initiative (GRI) is an international independent set of standards that help businesses, governments, and other organizations understand and communicate their impact on issues such as climate change, human rights, and corruption. These standards are used by over 10,000 organizations across 200 countries and are advancing the practice of sustainability reporting – which includes the reporting of business GHG emissions.
CLIMATE REGISTRY
The Climate Registry offers a variety of tools and guidance to help businesses track their emissions and become more efficient, sustainable, and accountable. Resources provided include access to the Carbon Footprint Registry, Net Zero Portal, and Protocols that outline best practices in carbon accounting.
CDP
The Carbon Disclosure Project asks for voluntary disclosures of non-financial data, which includes GHG emissions (along with a company’s broader financial performance such as water security, forest health, and preservation). CDP is a non-profit charity that runs global disclosure systems to be used by investors, companies, cities, states, and regions. Today, the CDP holds the largest database in the world of primary information regarding a company’s carbon footprint and carbon-reduction strategies. Eg. in 2020, more than 9,600 companies with (more than) 50% of the global market capitalization disclosed carbon footprint data through CDP. Information on climate risk alongside low carbon opportunities is requested. Industry peers are used as a benchmark as companies are scored and ranked publicly.
THE GREENHOUSE GAS PROTOCOL
The Greenhouse Gas Protocol was developed by the World Resource Institute and the World Business Council for Sustainable Development. The aim of the GHG Protocol is to help organizations track and measure their progress toward decarbonization. The GHG Protocol represents the most used standards for GHG accounting. Business emissions are measured, tracked, and recorded across 3 scopes – which have been defined above.
ISO 14064
ISO, WRI, and WBCSD worked together to ensure consistency amongst the ISO and GHG Protocol standards. As such, ISO 14064 is largely based on the GHG Protocol. The standards include minimum requirements for GHG inventories which provide the basic structure against which credible and consistent independent auditing can be performed. The ISO 14064 standard offers policymakers a ready foundation of best practices upon which to build a GHG reduction program. The aim of ISO 14064 is to improve consistency, increase flexibility, and decrease the effort associated with voluntary GHG inventories.
GHG REPORTING PROTOCOL BY USEPA
The United States Environment Protection Agency (USEPA) Greenhouse Gas Reporting Protocol (GHGRP) requires the reporting of greenhouse gas (GHG) data and other relevant information from large GHG emission sources, such as fuel and industrial gas suppliers, and CO2 injection sites in the United States. ~8,000 facilities are required to report their emission data under the GHGRP standards, and this information is made public in October of each year.
The GHGRP requires facilities to report two types of GHG emissions:
Combustion emissions that result from the burning of fossil fuels onsite;
Other emissions from industrial processes such as chemical reactions. Emissions from leaks or irregular emissions are also process emissions.
ESG REPORTING AND CARBON REPORTING
The demand for environmental, social, and governance (ESG) reporting continues to rise. Carbon accounting is incorporated within the E of ESG. In this sense, frameworks and standards for ESG reporting also apply to carbon accounting. Take a read of our article: ESG Reporting Frameworks, Standards, and Requirements to find out more.
Getting started with carbon accounting
Access to accurate and granular GHG emission data is essential for organizations looking to identify where to focus emission reduction efforts, develop a clear strategy, and track the impact of emission reduction activities. In the next section of this guide, we will outline 7 key steps to help you get started with carbon accounting.
CAPTURE BUSINESS EMISSION DATA
You want solid sustainability data to underpin your GHG accounting and decarbonization disclosures.
The main challenge to overcome in this step is the removal of organizational data silos. It’s common for companies to have GHG emission data scattered across various internal systems, with these systems running in isolation and not communicating with one another. For instance, your utility providers might not have systems and processes in place to share data. Below we’ve detailed best practices to help your business overcome this barrier.
Step #1: Consider outsourcing data
Consider outsourcing data capture to a specialist and aim to get close to the original data source if you can – for instance, take a meter reading rather than looking at invoice data. Aim to automate this process – you want to minimize the amount of human intervention involved.
Step #2: Work with your utility providers
Contact your utility providers and explore what data-sharing options are available. You can automate data provision via an online portal or an application programming interface (APR) that allows data exchange. If assessing utility meter data is impossible, explore sub-meter options.
Step #3: Create a robust and flexible data structure
You want to organize your data in a structured way, to support your decarbonization target. Consider the types of data your business needs to capture, and how that data can be tagged and aggregated. You can aggregate data at the account or meter level, which can then be further aggregated to location and then, reporting groups.
Meters and accounts: Account data is monthly or quarterly. Meter data is consumption data that’s delivered daily – using 15-30 min intervals and can be tracked at the same location.
Location: Where meter data is tracked and reported
Organization: Data reported at the whole-of-organization level is an aggregate of all locations and underlying data.
Reporting groups: Use groups to aggregate data from multiple locations. This can help you set boundaries for sustainability reporting.
It should be easy for you to reconfigure data and change reporting groups, locations, accounts, and meters that underlie it. Baseline emissions must be recalculated when your organization goes through structural change.
Step #4: Embed business processes for data management and ownership
Create an accountability matrix for data management and assign responsibilities to staff. This matrix needs to set out a regular schedule to review data completeness and to catch errors and address them. Note that the process of capturing data demands buy-in from a diverse range of stakeholders who’ll share data from their respective business units. Be mindful of the challenges this may present.
Your data storage process needs to be both auditable and traceable. Make sure your data management system can store reference documents and meet core audit requirements such as change tracking, time stamping, and data origin. Your aim is to have a trusted and secure single source where you can access this data, and share it with relevant stakeholders.
Keep a close eye on the data flowing in. You’ll want to set up an inactivity alert against each data source to identify data gaps early on. Follow up promptly with parties that have not fulfilled data provision commitments.
Step #5: Establish consistency and reliability in reporting processes
Keep track of decisions made and the reasons for them, with up-to-the-minute records of calculations and their inputs, plus relevant documentation and paperwork. Make sure to maintain data quality through clear lines of responsibility, regular attention, and by staying up-to-date with the changes made in reporting frameworks – noting that decarbonization guidelines are evolving and subject to change.
You can share data with the relevant stakeholders using bespoke reports and sustainability software that inform and engage. Use these reports as part of your engagement plan, and alongside the communication of your emission reduction mission.
CALCULATE YOUR BUSINESS’S GHG EMISSIONS
With a solid foundation of emission data, it’s now easier for you to calculate your GHG emissions for reporting and disclosure while also obtaining significant GHG reductions. You can use this data alongside selected emission reporting standards and frameworks mentioned previously, such as the GHG Protocol and the Carbon Disclosure Project.
To add to these standards, below we detail key focus areas when preparing your data for GHG accounting, reporting, and disclosure.
Step #6: Detail your baseline
You need a means of measuring progress. Your baseline is a clear line in the sand which will enable you to measure this progress. When setting your baseline, you need to consider:
How you will define the boundaries of your activities.
How you will structure your data so it can easily be captured for future activity.
What data is the most appropriate, making sure your historical work on carbon reduction isn’t discounted.
Make sure you’re clear about your objectives and understand the technical criteria to meet these goals.
Step #7: Use the correct emission factors for calculating GHG emissions
Selecting the right emission factor is essential but can present a challenge. When selecting the right EF to use, pay close attention to the following criteria:
Carbon accounting approach: Decide on whether you’re using a location-based approach to calculate emissions or a market-based approach. This will decipher what emission factors you need to use.
Region: Important when considering location-based emission factors, with the aim of selecting factors that are as granular as possible.
Reporting period vs factor period: Emission factor updates probably won’t align with your reporting timeline. With this in mind, set regular schedules for when to source and update factors. This will prevent confusion and maintain consistency between reporting periods and versions.
Emission sources: Make sure you know your emission source accurately. E.g. is your vehicle fleet running on diesel or gasoline? Selecting the wrong emission factors will cause errors in your GHG reporting processes.
Step #8: Use consequential carbon accounting methods
You want to use consequential carbon accounting methods over attributional carbon accounting to measure the effectiveness of implemented carbon reduction initiatives for reducing business emissions. Attributional carbon accounting is most effective for establishing your business baseline and tracking business-related emissions at set time intervals. However, to establish the effectiveness of sustainable change, and to reduce global GHG emissions – which is your overarching aim – means a consequential carbon accounting approach must be applied.
Carbon accounting developments and challenges
The nuances of carbon accounting continue to evolve, with the most recent changes relating to the way organizations account for renewable energy purchases, capture business scope 3 emissions, and report on a 4th emission scope. In the next section of this article, we explain these developments.
UTILIZE THE MARKET-BASED APPROACH TO MEASURE SCOPE 2 EMISSIONS
Before 2015, organizations were required to report their scope 2 emissions based on standard grid-average emission factors. However, this approach – known as location-based carbon accounting – meant innovative companies working to reduce business scope 2 emissions were not receiving the credit they deserved for their efforts. That is, companies obtaining electricity from the same grid supplier are lumped together under one emission factor.
Issues with this approach led to the development of the market-based approach. Scope 2 emissions under this approach are determined by the mix of EACs, contracts, utility emission rates, and residual mix emission factors – which a company has a significant degree of control over. With this approach, organizations pursuing clean and renewable energy gain the credit they deserve.
It’s therefore important your organization favors the market-based approach to capture scope 2 emissions over the location-based approach.
ACCOUNTING FOR AND REDUCING SCOPE 2 EMISSIONS
Renewable energy certificates (RECs) play an essential role in energy systems today, and help organizations reduce business-related scope 2 emissions. Most energy purchased comes in the form of electricity from the grid. Traditionally, RECs give organizations the opportunity to reduce scope 2 emissions through the concept of additionality or carbon-offsetting, as we explain.
In additionality, a business matches electricity demand with the MWh of electricity provided via purchased RECs. In this sense, emissions are canceled out. The aim is to have 24/7 carbon-free energy. For every hour of operation, attributes are found. This means the business injects the same amount of energy as it takes from the grid using the renewable energy provided by RECs.
Another approach is to seek attributes at locations where marginal emissions are high. RECs are purchased to displace emissions caused by the marginal emission factor. This second method is more of a carbon offsetting approach.
However, the effectiveness of RECs to reduce an organization’s scope 2 emissions via these two approaches is limited because temporal and geographical information is not supplied. To improve the system, a more granular method has been developed by the company Energy Tag.
Energy Tag has developed a system in which REC certificates give a time stamp stating where the energy came from at the specific hour of the day, and from what renewable energy source and plant. This means granular RECs represent the energy your business is using for every hour of the day. To explain further, let’s work through an example.
Say your business is operational in Indiana. You seek RECs from Texas to cancel out the fossil-fuel-generated electricity from the grid in Indiana. You buy Texan RECs because they’re in plentiful supply and cheaper in this region. This is because RECs come from a large Texan wind farm. However, this wind farm is only operational at night, meaning you cannot state that during the time period within which your business runs, the electricity supplied is renewable or completely accounted for by the RECs you purchased.
Now, consider the fact that the marginal emission factor in Indiana is a lot higher than in Texas, meaning your business places more pressure on the grid than is fully accounted for by the RECs you purchase.
A granular REC, on the other hand, records the amount of energy produced in a certain period and gives the location and source. E.g. 1 MWh of solar energy is produced in Indiana. Not only do these certificates bestow a more accurate representation of your business’s impact on global emissions, but they also give a time-based signal to markets conveying the real value of RECs. E.g. RECs from solar energy are more valuable at night than during the day.
Large tech companies such as Google and Microsoft have set targets to power operations on 100% clean energy, every hour, by 2030. In addition, the US Federal government is set to buy half of its energy on an hourly time frame using time-based RECs. Hence, granular REC certificates are entering the market, and the demand for this system is increasing. It’s important your business seeks granular RECs when they’re available to truly account for, and reduce scope 2 emissions.
IMPLEMENT BEST PRACTICES AND SEEK MORE ACCURATE MEASURES FOR SCOPE 3 EMISSIONS
The CDP Supply Chain Report cites supply chain emissions are 5.5x greater than scope 1 and 3 emissions. Hence, capturing scope 3 emissions is vital to gain a more thorough understanding of how your business impacts the environment. Unfortunately, capturing scope 3 emissions is the most difficult. But luckily developments in this area are helping organizations better understand such emissions.
To help you effectively track your business scope 3 emissions, adopt the below best practices:
Use sustainability software to automate what would otherwise be a painstaking manual data collection process. You want to utilize sustainability software that uses electronic data interchange (EDI) and artificial intelligence (AI) technology.
Be prepared to rely on manual surveys and conversations with individuals that represent key emission hotspots along your supply chain.
Note that the data you obtain from various suppliers will come in different formats. Steps #4 and #5 specified in this guide give the flexible data structure you need here.
Make sure to account for business scope 3 emissions across every category as detailed by the GHG Protocol (categories detailed in our carbon accounting glossary). Use the supplier-specific, physical unit, spend-based, and hybrid-based methods to account for emissions in each category.
Understand the shortcomings of scope 3 emission reporting and how these can be overcome using alternative methods, such as the E-Liability method discussed below.
UNDERSTANDING THE NEED FOR AN E-LIABILITY ACCOUNTING SYSTEM
The issue with accounting for and addressing business scope 3 emissions is that most companies only know a few of their non-tier-1 suppliers. Plus, companies often don’t know their customers well enough to gauge meaningful data from them – to understand how their product will be disposed of, or how their service will be utilized, which will have a significant impact on a product’s or service’s downstream emissions. Yet, the GHG Protocol expects companies to diversify product lines to gather emission data from all of their multi-tier customers and suppliers – a complex task.
Hence, accounting for business scope 3 emissions has meant the GHG Protocol allows companies to use industry and regional averages, rather than pursuing actual measures from suppliers, distributors, and consumers.
This secondary data – to only be used when primary data isn’t available – is obtained from published databases, government statistics, literature studies, industry associations, financial data, proxy data, and other generic data.
However, using secondary data in certain circumstances seriously undermines the integrity of emission reporting. Imagine producing financial reports using industry cost averages rather than actual invoice information.
In addition, now let’s say a company makes a fundamental and innovative change to reduce business emissions. The organization’s downstream customers are then able to report lower emissions as a result – as they should. However, these changes will also reduce emission averages for the industry, meaning through the use of secondary data, all of that brand’s competitors and all of their downstream customers can also claim the emission-reduction benefits. This would be an inaccurate representation of competitor emissions meaning companies that aren’t even trying to lower their emissions will gain from another organization’s proactive GHG reduction efforts.
To address this issue, Pro. Robert S. Kaplan from the Harvard Business School and Pro. Karthik Ramanna from the University of Oxford have developed an alternative approach for accounting for scope 3 emissions, termed the E-liability approach.
The E-liability approach explained
E-liability is an accounting algorithm that allows organizations to produce real-time, accurate, and auditable data on their scope 3 emissions. The method combines well-established best practices from the financial sector and cost accounting with recent advancements in climate science and blockchain technology.
Blockchain technology is a shared, immutable ledger used to facilitate the process of recording transactions and tracking assets within a business network. Blockchain technology is important as it provides immediate, shared, and completely transparent information that’s stored on an immutable ledger, to be accessed by permission network members. The blockchain network can track orders, payments, accounts, production, and much more.
With E-liability, each supplier along the supply chain records direct carbon emissions. This data is then transferred to the next supplier along the chain.
To explain, supplier one in a value chain will measure and record direct emissions from operations – the extraction of raw materials. These emissions are then transferred to supplier two. Supplier two will record emissions from operations – the manufacturing of products from raw materials. Supplier two will assign transferred emissions and emissions used onsite to the various products. This is similar to the standard accounting practice that assigns the cost of materials and overheads to the finished products. The total emissions used to make and distribute products are then transferred to the next supplier in the value chain. In a method similar to how value-added taxes work, the E-liability approach also solves a counting problem in carbon accounting protocols.
The carbon footprint of a product or service is therefore tracked from the raw materials right until its arrival at the customer’s gate. Just as an organization tracks costs occurred from the sourcing, manufacturing, and distribution of products, the carbon footprint of these processes is also tracked via E-liability.
Once more, the E-liability approach does not demand expensive and complicated software systems to run. Information technology, such as blockchain, combined with existing inventory and cost accounting systems can provide an audit trail for E-liability transactions. Emission data for each service/product will automatically aggregate into company-level accounts, just as in financial reporting. The data can be presented in a format similar to a financial balance sheet, making it easy for independent analysts to verify.
Through the E-liability method, every player in the value chain is encouraged to make changes to reduce GHG emissions. Plus, the end user will see not only their purchase price but also the volume of greenhouse gas emissions emitted during every production stage.
THE NEW SCOPE: ACCOUNTING FOR SCOPE 4 EMISSIONS
There’s growing interest in the adoption of a fourth scope, to calculate and report emissions avoided by using a brand’s products or services. The impacts of which can have either positive or negative climatic effects.
Scope 4 emissions have not yet been standardized in reporting, but it’s expected that guidance on scope 4 reporting will be released in the future. Methodologies have yet to be agreed upon, but the GHG protocol is recommending a consequential approach over an attributional approach to estimate the comparative impacts.
Free nights and weekend energy plans allow consumers to save money by offering reduced rates during off-peak hours. By shifting high-energy activities to these times, households can lower their electricity bills. These plans are ideal for those with flexible schedules who can adjust their energy usage accordingly.
Understanding Free Nights and Weekends Energy Plans
For many households, electricity bills represent a significant recurring expense. Finding effective ways to reduce these monthly costs can directly and positively impact financial health. One innovative method is leveraging the free weekends electricity in Texas plans. These unique energy plans offer consumers free or substantially discounted electricity rates during specific off-peak periods, notably nights and weekends, when the demand on the power grid is lower.
By taking advantage of these plans, consumers can reduce their electricity expenses by altering their energy usage patterns. This guide is designed to help you better understand these energy plans and explore how you can benefit from them financially. If you have the correct information, you can maximize your savings and help create a more sustainable energy usage model.
How Free Nights and Weekends Energy Plans Work
Free nights and weekend energy plans are meticulously designed to incentivize consumers to use electricity during designated off-peak hours. During these periods, the overall demand on the energy grid is significantly lower, enabling power companies to offer free or reduced-cost electricity. This helps balance the grid load and reduces energy providers’ operational costs. This benefit is passed on to the consumer through lower electricity bills.
To fully use these programs, consumers may schedule energy-intensive operations, including running washing machines, dishwashers, or air conditioning and heating systems, during the designated off-peak hours. Understanding your plan’s exact terms and conditions, including the specific hours classified as free or discounted, is crucial to achieving maximum savings. Hence, knowing these details equips you to make informed decisions about energy usage.
Advantages of Free Nights and Weekend Plans
Cost Savings: The primary advantage is the significant reduction in electricity bills. By scheduling energy-heavy activities during free periods, households can considerably decrease their monthly expenses. This cash flow boost might be used for savings or other essential household expenses.
Environmental Benefits: Shifting energy usage to off-peak times cuts costs and benefits the environment. Stabilizing the electrical system through decreased carbon emissions and reduced reliance on new fossil fuel power plants leads to developing a more environmentally friendly and sustainable energy consumption pattern.
Extended Appliance Lifespan: Avoiding heavy usage of appliances during peak times can mitigate wear and tear, extending their operational lifespan. This leads to long-term savings by delaying expensive repairs or replacements.
In line with the U.S., According to the Department of Energy, these off-peak times help save costs while promoting grid stability and environmental sustainability. Adopting these plans can be a win-win for your wallet and the planet.
Challenges to Consider
While free nights and weekend plans offer numerous benefits, consumers should know about their challenges. Adjusting your lifestyle to accommodate significant electricity usage during off-peak hours may require effort and meticulous planning. It may involve rethinking your daily routines and appliance usage schedules to align with the free periods offered by your plan.
It’s also crucial to fully comprehend the plan’s particular terms and conditions. Knowing when electricity is free or discounted is fundamental to maximizing benefits. Overlooking these details can result in missed opportunities for savings or unintended additional costs. Therefore, a thorough read-through of the plan’s specifics is crucial for optimizing its advantages.
Real-Life Savings Examples
Many households have reduced their electricity bills by adopting free night and weekend plans. For example, a family in Texas cut their monthly energy costs by about 20% by strategically operating their laundry and dishwashing machines during off-peak hours. These significant savings allowed them to allocate more resources to other household needs or savings.
Similarly, another household reported that their year-long savings were substantial enough to invest in more energy-efficient appliances. This further amplified their cost reduction and contributed to a more sustainable lifestyle. These real-life examples underscore the tangible financial benefits and the positive impact such plans can have on household budgets.
Choosing the Right Plan for You
Selecting the right energy plan requires thoroughly evaluating your household’s energy consumption patterns. Assessing whether significant portions of your electricity usage can be feasibly shifted to nights and weekends is crucial. It’s also essential to fully comprehend the plan’s particular terms and conditions.
When comparing different plans, please pay close attention to their terms and conditions. Ensure you read the fine print to comprehend potential hidden fees or specific conditions affecting your savings. Choose a plan that aligns well with your energy usage habits and offers the best cost benefits.
Tips for Optimizing Savings
Programmable Thermostats: Use a programmable thermostat to manage your home’s heating and cooling systems during off-peak hours. This can help you automate energy usage without compromising comfort.
Smart Home Devices: Utilize timers and smart plugs to automate the operation of various household appliances. These devices can help you efficiently schedule appliance usage during free or discounted periods.
Energy-Efficient Appliances: Invest in energy-efficient appliances that consume less energy. Running these appliances during off-peak times can further amplify your cost savings and contribute to environmental sustainability.
Educate Household Members: Make sure that every home member knows the advantages and when to utilize energy while it’s free. Collective efforts can significantly increase the overall savings and optimize the plan’s benefits.
Conclusion
Free nights and weekend energy plans present an excellent opportunity for households to achieve substantial savings on their electricity bills. You can take full advantage of these plans by understanding your energy usage patterns and making strategic adjustments. Always compare different options and carefully read the fine print for the best deal.
With a little effort and planning, you can enjoy significant savings and contribute to a more balanced and efficient energy grid. For further insights on the environmental and economic impacts of peak and off-peak electricity usage, refer to Science Daily’s detailed article.
To provide the best experiences, we use technologies like cookies to store and/or access device information. Consenting to these technologies will allow us to process data such as browsing behavior or unique IDs on this site. Not consenting or withdrawing consent, may adversely affect certain features and functions.
Functional
Always active
The technical storage or access is strictly necessary for the legitimate purpose of enabling the use of a specific service explicitly requested by the subscriber or user, or for the sole purpose of carrying out the transmission of a communication over an electronic communications network.
Preferences
The technical storage or access is necessary for the legitimate purpose of storing preferences that are not requested by the subscriber or user.
Statistics
The technical storage or access that is used exclusively for statistical purposes.The technical storage or access that is used exclusively for anonymous statistical purposes. Without a subpoena, voluntary compliance on the part of your Internet Service Provider, or additional records from a third party, information stored or retrieved for this purpose alone cannot usually be used to identify you.
Marketing
The technical storage or access is required to create user profiles to send advertising, or to track the user on a website or across several websites for similar marketing purposes.


")


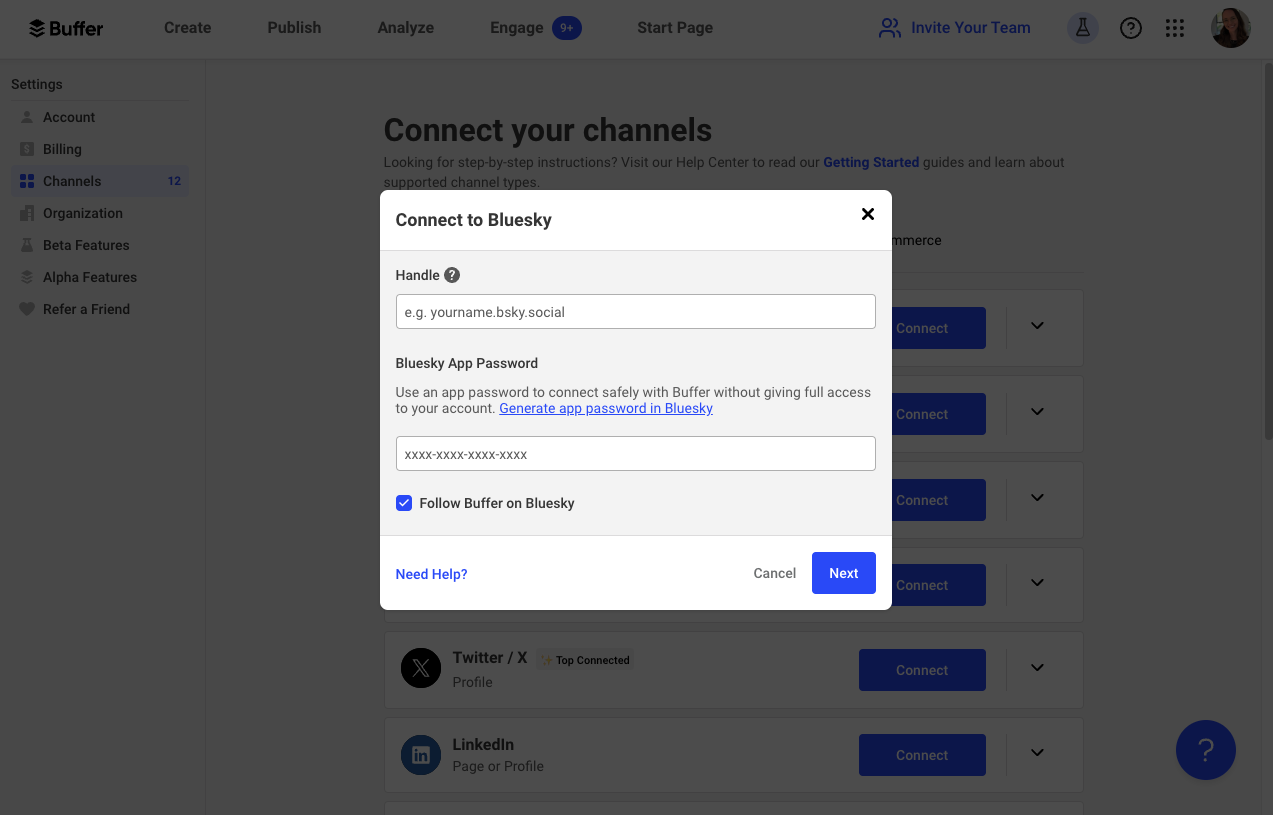


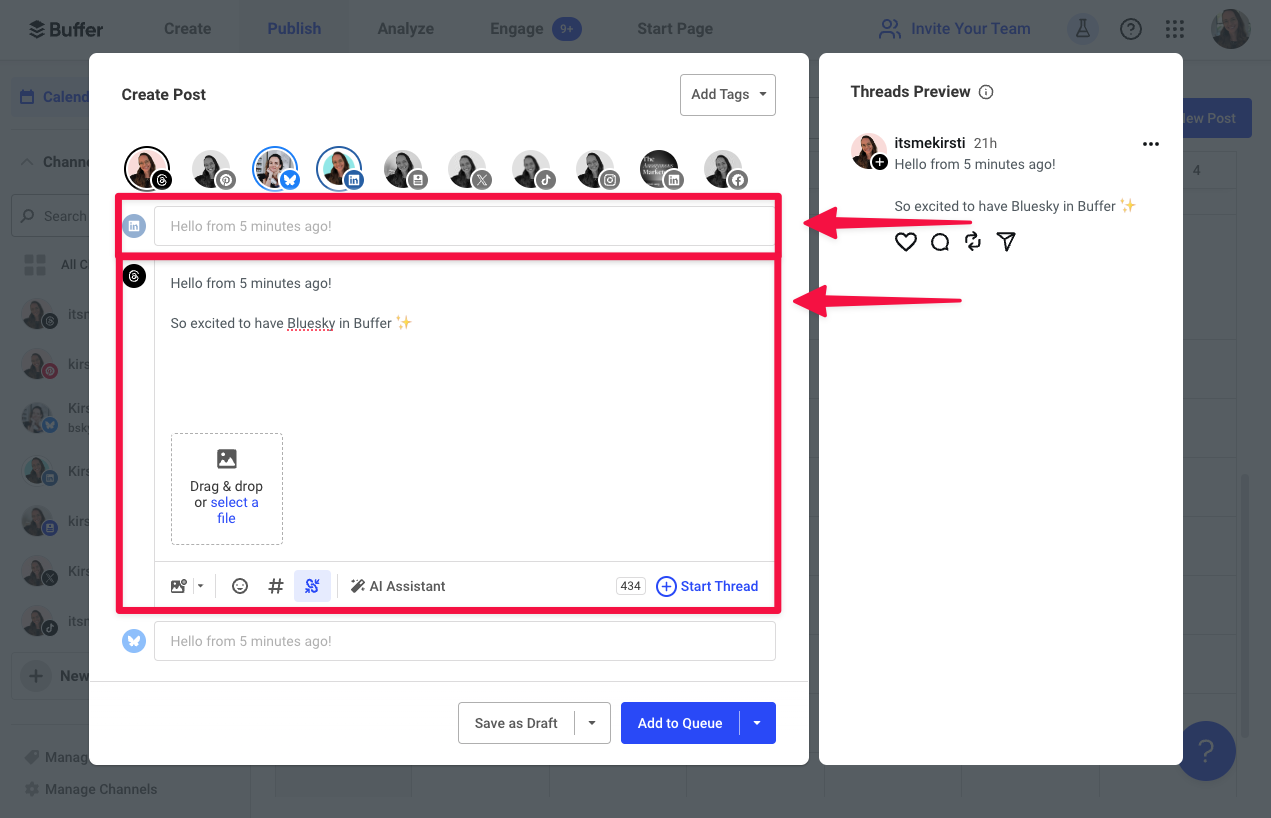


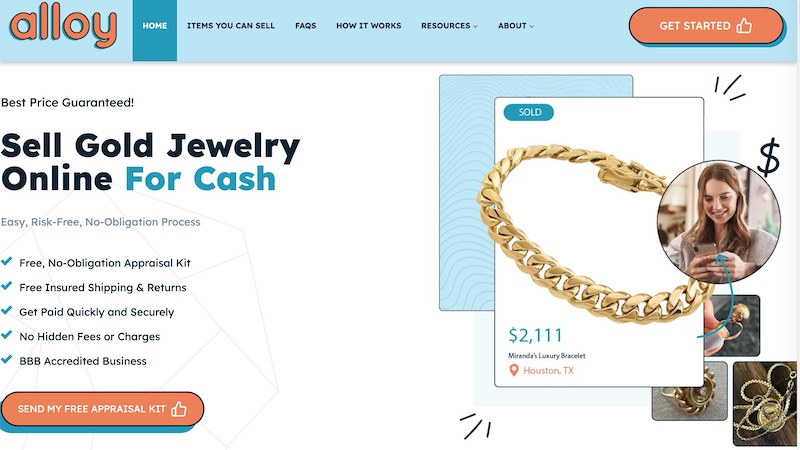
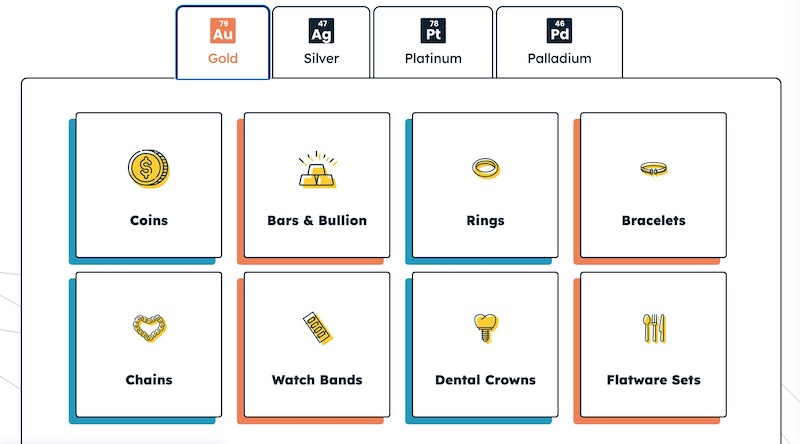

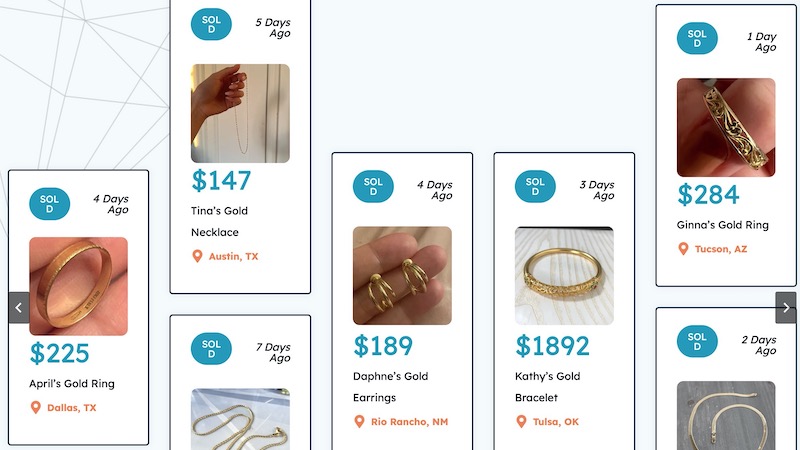


![How to Create Detailed Buyer Personas for Your Business [+Free Persona Template]](https://i0.wp.com/proprofit.co.uk/wp-content/uploads/2024/08/buyer-persona-research_1.webp.webp?fit=595%2C396&ssl=1 "How to Create Detailed Buyer Personas for Your Business [+Free Persona Template]")


